Saturday, May 16, 2020

Salad Days

 Over the past week I have been trying to eat healthy foods, do more exercise and live the clean life.  I have been eating salads and drinking smoothies. I have reduced red meats and I cut out the beer and red wine entirely.... and NOTHING.... not a pound shed. Usually the first few pounds drop pretty quickly and that motivates me to keep going. This week, however, I actually gained a few pounds... so I just stopped stepping on the scale. I'm feeling frustrated because me and my husband actually had a bet riding on it... and I'm losing (the bet...not any inches or pounds).  So last night we ordered pizza and had some wine with it. Salad days no more! That said, I'm not giving up... I'm still going to keep plugging on. Even if the only thing lighter right now is my pocketbook. Tonight I'm making Indian food and homemade naan... but starting tomorrow it's back to salad days once again.

I'm on the hunt for interesting low fat foods and ways to make exercise fun. I love to cook and the only way I will get through this is by resetting my thinking and finding fun food and cooking projects that aren't bad for me.

I have my work cut out for me. My biggest weakness is fresh baked bread. I can't give that up entirely, but I will try my hardest to make my baking healthier and less frequent. If I fail at that I may be delivering baked goods to my friends to save myself!


What is your favorite trick to eating healthier and getting more active?  Leave a comment and share!


Tuesday, May 12, 2020

Pokebowl GO!

Today for lunch I made Poke bowls.  Normally we have salmon and cream cheese on bagels as one of our afternoon meals but this week my husband and I are embarking on a healthy eating challenge and I thought I'd look for an alternative to the  bread-y bagels  and rich cream cheese. This was filling and wonderful and it could be made with a variety different ingredients. Several of the recipes that I found even used "anything bagel" topping in place of the furikake. The possibilities for these bowls are limited only by your imagination. It would be a great way to use leftover slaw or salad and rice.

If you'd like to know more about the origin of Poke I found this article on Chowhound.

Furikake (this makes enough for 4-6 servings)

2 nori sheets cut into small pieces
2 T. toasted sesame seeds
2 t. sugar
1/2 t. sesame oil
pinch of salt

Dressing (I doubled this recipe and I had plenty leftover for another round of salads)

2 T. soy sauce
2 cloves garlic
Juice from one half a lime
1 T. each rice wine vinegar, sugar and sesame oil

The Bowl:

  • You'll need to make some rice (brown, long grain, or jasmine all will work)
  • 2 oz smoked salad per serving
  • 1/2 - 1 scallion per serving
  • 1/4 of an avocado per serving
  • 2-4T chickpeas (I didn't have soy beans and I was surprised at how well this worked)
  • Thinly sliced veggies (I used cucumbers and sweet peppers)
  • pickled gin

I marinated the salmon in some of the dressing for about a half hour, but frankly I don't think that was totally needed. Smoked salmon is already pretty salty and I think it could have done with a lighter marinade of just a little sesame, citrus, garlic, vinegar and sugar.

After the rice was made I cooled it and topped it artfully with all the wonderful things I chopped up. 

Some things I might add that I didn't today: something crunchy like nuts or chopped cabbage, other veggies like radishes and carrots, other meats like left over chicken, marinated tofu... the possibilities are endless!

What do you like on your Poke Bowl?


Monday, May 11, 2020

Time for Thai

I love making Thai food. One of my favorite things about it is that once you get the prep work out of the way it is amazingly fast and easy to make. My two favorite Thai dishes to make are Green Curry and Pad Thai. I especially love the green curry because it is so versatile.
If you have the seasonings and the coconut milk you can add just about anything you have to the sauce. The only hitch is that the ingredients don't cook long in the sauce so ingredients that take a long time to cook need to be cooked before you add them to the sauce. The only ingredient that I wasn't fond of cooked in green curry sauce were potatoes. Potatoes really work best when they have plenty of time to soak up the flavors of the sauce and par boiling them and adding them to the curry sauce really didn't work. It was ok it was just bland for a curry.

So the key to this like I said is time management. I really think that you need to have all the ingredients prepped and ready to go before you heat up the wok.

2T. oil or ghee
1.5-2 lb chicken
1 T. grated ginger
1-3 jalapeños
3 cloves of garlic
1 shallot or small onion
1/2 tsp. cumin
1/4 tsp. coriander
1/4 tsp. tumeric
1 can coco milk
2 Tbsp. lime juice
1 medium bell pepper
1 C. sugar snap peas
1/4 fresh basil and cilantro

To prep:  I like to start by putting on my rice. If I put it on while I prep then I won't forget. Then I cut up chicken. Next I chop onions, jalapeños, ginger, and garlic and place them in a bowl with the spices. Make sure to open your can of coconut milk and squeeze the lime juice. Then cut up your bell peppers and put them in a bowl with your snow peas. Now that all the chopping is done you are set up to cook just like they do on the cooking show.

The cooking:

  1. Cook the chicken in butter until it is cooked through and then set aside.
  2. Add the bowl that you set aside with the spices, jalapeños, ginger, onion, and garlic. Cook for 2 minutes. 
  3. Add salt, coco milk, lime and your bowl with the snap peas and peppers. Cook until it is a vibrant yellow and green color.
  4. Take it off the heat, stir in chicken and allow to cool slightly before you add in the fresh herbs.


Tell me your favorite prepping short cut.


Friday, May 8, 2020

The Upper Crust

 Making bread has become a regular part of my cooking routine.  Even before the stay at home orders I was baking bread pretty much weekly. So when everything went a little nutty at the store and yeast started flying off the shelves I was glad I was fairly stocked up. I only had one time when I was in need and Gumby's Pizza came to the rescue and sent a small ranch container of yeast with our Pizza order. Last night I made my typical artisanal bread. It makes two small loaves, which is enough for dinner and then a loaf for breakfast the next day. This is a pretty easy recipe and one I use a lot.

Ingredients
2 C warm water
1 T sugar
1 T yeast (or one packet)
1 T. salt
4-5 cups flour


First add the sugar water and yeast together and let it sit for 5 to 10 minutes until it gets frothy.  I do this in the bowl for my stand mixer so that I can just add the flour and start mixing when I'm ready.

Next using the bread hook add the flour and the salt. I add about 3 cups of flour and then add the flour a cup at a time until it starts to pull away from the side of the bowl
.

    Have it rise until doubles
Once the mixture is just mixed together I like to hand knead my dough for a while. If you don't want to do that then you will just let the mixer work on it until the dough has an elastic texture.


Next I transfer my dough to a glass bowl that I've coated with olive oil. I let the dough rise until it doubles in size. It can take as little as 30 minutes but it usually takes closer to an hour.
Divide the dough in half

Punch down the dough and divide it into two equal parts. You will form each half into a loaf. You can make long loaves like I did last night... or round ones. Or you can make one of each. Cut three slashes in the top of each loaf and leave them for the second rise (about 30-45 minutes).
While you wait for them to rise cover with a towel. Preheat the oven to 400 degrees. I like to bake mine on a pizza stone that I keep in the oven while it preheats. Bake for 30-40 minutes and then cool on a wire rack.  Serve with olive oil or butter.
Here are what the loaves look like after the second rise
Now it's time to eat.


Thursday, May 7, 2020

Pick a Peck of Pita Pockets

I made pita bread for the first time the other day. We used it to serve lamb burgers with taziki sauce. It tasted so much better than the store bought stuff. I looked at a lot of recipes and finally settled on one. It puffed up nicely and it made the perfect pocket to put our burger in. We served it with a side salad (with olives and feta cheese). I will share the recipe and a few pictures. It is no wonder that pita bread has been around for so long (since approximately 2500 BC)...because not only is it food... it's a utensil.  


Ingredients
8 almost perfectly puffed pitas


1 package active dry yeast (I used Platinum from Red Star... I wish I had taken a picture of the first rise... it was spectacular and didn't take nearly as long as expected)
1 teaspoon turbinado sugar
11/2 cups warm water
1 teaspoon salt
31/2 cups flour, plus more for dusting
olive oil

Directions

  1. In the bowl of a heavy-duty electric mixer fitted with a dough hook, combine the yeast, sugar, and warm water; stir to blend. Let the yeast stand until foamy, about 5 to 10 minutes.
  2. Stir in the salt. Add the flour, a little at a time, mixing at the lowest speed until all the flour has been incorporated and the dough gathers into a ball; this should take about 4 minutes.
  3. Turn the dough onto a lightly floured surface and knead until it's smooth and elastic. Transfer the dough to a lightly oiled bowl, turn it over to coat, and cover with plastic wrap. Allow to rise until double in size, about 1 1/2 hours.
  4. Place a large pizza stone on the lower oven rack, preheat the oven (and stone) to 500 degrees F.
  5. Punch the dough down, divide it into 8 pieces, and gather each piece into a ball; keeping all of them lightly floured and covered while you work. Allow the balls of dough to rest, covered, for 15 minutes so they will be easier to roll out.
  6. Using a rolling pin, roll each dough ball into a circle that is about 8-inches in diameter and 1/4-inch thick. Make sure the circle is totally smooth, with no creases or seams in the dough, which can prevent the pitas from puffing up properly. Cover the disks as you roll them out, but do not stack them up. Put 2 pita rounds at a time on the hot pizza stone and bake for 3 to 4 minutes, or until the bread puffs up like a balloon and is pale golden. Watch closely; they bake fast. Remove the bread from the oven and place on a rack to cool for 5 minutes; they will naturally deflate, leaving a pocket in the center. Wrap the pitas in a large kitchen towel to keep them soft.
    Look at that beautiful pocket!

Tuesday, May 5, 2020

The Hunger Games

I love cooking competitions. It all started a few years after I was married when I borrowed a friends collection of Iron Chef on VHS. I loved that show! My husband and I would  watch that poorly dubbed gem and eat junk food until late in the night. 

Whose cuisine will reign supreme? Iron Chef | Alex England TV ...

I'm not a huge fan of the newer versions of Iron Chef. I have watched a few episodes and even though they are fine they just don't remind me much of the original show. Iron Chef for me was all about being campy and showcasing interesting ingredients. Iron Chef America always seemed like it was just a Food Network vanity showcase.Some of the other shows I've enjoyed along the way are:  Cut Throat Kitchen, Top Chef, Chopped, and even though I don't like cake very much I love watching shows where they decorate cakes and cupcakes. The only shows that are off the table for me are all those mean spirited ones with Gordon Ramsey yelling at everyone.One of my all time favorite cooking competitions is The Great British Baking Show. So when I heard that the 2015 champion Nadiya Hussain had her own cooking show on Netflix I decided to check it out. I have to say that it didn't totally WOW me, but it has a lot of good ideas and I think that I will watch it again. Her approach is to help people save time in the kitchen by using shortcuts. Some of her ideas are really clever and with a little tweaking I think that I will be able to use some of her ideas and recipes at home. I've only watched a few episodes so the jury is still out. Some of her shortcuts are a little on the short side for me.... for example I would never use spaghetti Os in ANYTHING. Most of her recipes, however, sound pretty good. Here is the recipe I tried at home:

I didn't have any mushrooms on hand so I started out by sautéing bell peppers, onions and garlic for my omelet.


I add the eggs to the mixture.  Unlike her I didn't have any sun-dried tomato spread so I used pesto sauce on my tortilla. 

I topped the omelet with the tortilla. Flipped it. Then cooked until the tortilla was crispy and the eggs were fully set. I rolled it up and served it with a salad and marinated tofu.

What is your favorite cooking show?  

Monday, May 4, 2020

Go To Your Frappe Place!

Sadly, I can't go to my Frappe place right now.  With coffee shops closed (other than drive thru services) I have to find other ways to support my local shops. I do that by buying beans to make coffee at home. Most days I just like to brew a cup in my stove top espresso maker... or better yet have someone else brew it and bring it to me in bed. Lately, however, my daughter has been making frappes at home. It is a wonderful way to enjoy a cup of coffee even on a hot day. She likes to use caramel sauce, but you can use other flavors if you like.  Many recipes call for instant coffee, but I prefer it this way.
Here is her recipe:

1 C coffee
1 C milk
2 C ice
vanilla extract, to taste
caramel sauce, to taste
sugar, to taste
whipped cream

Blend it all together, pour it in a pint glass and top with whipped cream and a little caramel sauce.  Enjoy!

Easy Caramel Sauce:


I C. packed brown sugar
1/2 C. butter
1/4 C. milk
1 t. vanilla

Bring brown sugar, butter, and milk to a gentle boil and cook until thickened, 1 to 2 minutes. Remove from heat; add vanilla extract.


Thursday, April 30, 2020

Kitchen Scrap Gardening


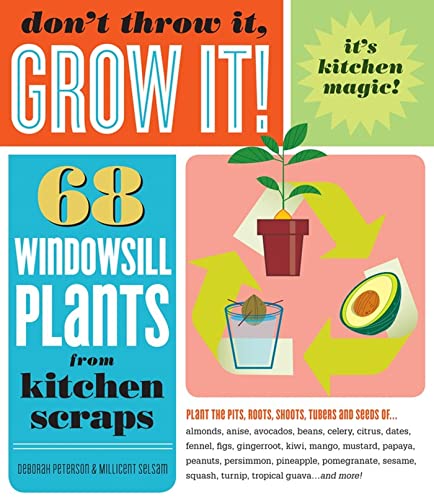
Don't Throw It, Grow It!: 68 windowsill plants from kitchen scraps: Peterson, Deborah

I have been reading a lot about kitchen scrap gardening. I checked this book out on Libby (my online library app) and I was intrigued. I can say with absolute confidence that I DO NOT have a green thumb, but I was able to find a few projects that I think I might be able to do.  I'll update my progress as I go. I'm sure some things will be a flop but others will do well. In fact, my oldest daughter has already had a little success with growing some lettuce. All she did was put the base of a head of Romain in the ground and a few days later it had leaves already sprouting. She also planted some carrot tops, and while we may not really get a crop of carrots out of it, they have already started to sprout some greens. My next project is going to be to try and get some herbs going from the fresh herbs I bought at the grocery store. I don't want to go to the hardware store to buy seedlings  and the basil my daughter planted never sprouted, so I'll see how it goes trying to propagate them from cuttings. Right now I have basil, mint, cilantro and dill cuttings. I might ask around on the neighborhood Facebook page for some more cuttings.
Potatoes
                                                         
Here are the potatoes we started. I found that some of my potatoes had formed buds so my daughter cut them and we let them dry for a few days. I planted them in a recycle bin in a sunny spot and watered them. I left just a little of the sprouted part sticking out. From what I've read I just need to add dirt as the plant grows to give the potatoes room to grow. I'm not sure that we will get much out of it, but they were just going to go in the trash anyway so why not put them to good use in the yard, If nothing else they will add some organic matter to the soil. I have another recycle bin as well next time I have to go to the grocery store I might try to purchase some potting soil so I can get something else going.  Any suggestions? (leave a comment if you do)


Celery and lettuce
I also planted some lettuce and celery in pots. Many of the instructions I've read say to start them in water, but the lettuce that my daughter started in her garden worked great without propagating it in water first. We shall see what happens. I am not too worried about it. I didn't purchase anything to make this garden. All I did was reuse things that I already had lying around.

Lettuce
My daughter just put the bottom of some lettuce in the ground less than a week ago and it is already starting to grow leaves.  She planted a few carrot tops as well.  They have nice cute little plants growing out of the top.


It has been nice doing a few little projects around the garden. I have never been successful at it in the past, but with kitchen scrap gardening I know that the only thing that I'm putting into it is time... and I have a lot of that right now... so what can I lose.


So far I have planted potatoes, carrot tops, lettuce, celery, and green onions.  I plan to work on propagating herbs,  and planting some ginger and garlic.  If you have any easy ideas on things to plant that are easy and cheap then let me know in the comments.


Wednesday, April 29, 2020

Ding Dong Ditch

Ding Dong Ditch....Remember that game? 

It went by other names as well... but basically it was a prank where kids would approach a stranger's door, ring the bell, and then run and hide. There are a variety of names for the game (depending on where you live). It is not a particularly creative prank, but at least it is a more innocent prank than some similar ones that were popular in my day like TPing houses (although this one might be welcome in these times of shortages) or leaving a flaming bag of nastiness on the porch.  

In this time of social distancing my daughters have been feeling low. Today my younger daughter asked if she could make cookies and deliver them to some friends. So tonight we rang the bell, stepped back to a safe distance, and waved..not exactly ding dong ditch... but a new era of ding dong ditch.  Random bell ringing with a prize at the end... not the giggling excitement of hiding in the shadows...  but cookies and a glimpse of a familiar face. And sometimes a gift for the bell ringers as well.


The cookies
Ding Dong
A tip for the delivery driver


The original Toll House cookie Recipe 

INGREDIENTS

    • 2 1/4 cups all-purpose flour
    • 1 teaspoon baking soda
    • 1 teaspoon salt
    • 1 cup (2 sticks) butter, softened
    • 3/4 cup granulated sugar
    • 3/4 cup packed brown sugar
    • 1 teaspoon vanilla extract
    • 2 large eggs
    • 2 cups Nestlé Toll House Semi-Sweet Chocolate Morsels
    • 1 cup chopped nuts


PREPARATION

    1. Preheat oven to 375°F.
    2. Combine flour, baking soda, and salt in small bowl. Beat butter, granulated sugar, brown sugar, and vanilla extract in large mixer bowl until creamy. Add eggs, one at a time, beating well after each addition. Gradually beat in flour mixture. Stir in morsels and nuts. Drop by rounded tablespoon onto ungreased baking sheets.
    3. Bake for 9 to 11 minutes or until golden brown. Cool on baking sheets for 2 minutes; remove to wire racks to cool completely.

Tuesday, April 28, 2020

When Buffalos Fly

It has been a long time since I have written a blog entry. I am really out of practice... and I am not really sure why I decided to write my first entry in years about Buffalo wings... but here it is. I am going to try to write something daily. Typically this blog was about food and food lore, but for now I think I'm just going to write about anything that I find interesting.

I often feel bored right now, but feeling bored doesn't have to be a bad thing. Sometimes it can force you to try new things or look at something common and day to day in a new way. Maybe if I write about it I will find ways to make the best of this time and put my boredom to good use.

Buffalo Wings

I love making hot wings. They are so easy to make at home and it makes things seem a little more festive. Especially now that going out to eat is not a possibility it is nice to add a little festive into the mix. 

Buffalo wings were invented at a bar in Buffalo, New York in 1964. They weren't popular outside of New York until the mid-80s. Now it is hard to imagine a game night party without them. They are usually served with blue cheese and celery. Although here in Texas you are just as likely to see them served with Ranch.

The classic buffalo wing sauce is made with butter and chili sauce, but now that there are so many restaurants devoted entirely to hot wing there are countless possibilities. They range from the tame all the way to the 5 alarm fire variety. Here are the two I make the most. If you have a good recipe for hot wings then let me know in the comments. You can even share a link to your recipe.

Here is how I make mine:

To cook wings-

Preheat oven to 450°F. 


Arrange wings on large foil-lined pan. Bake on lowest oven rack for 30 minutes or until crispy, turning once. I usually make a lot and so I can sauce them two different ways.


Classic Sauce:
  • For 2 ½ lbs chicken
  • ½ c. hot sauce 
  • ⅓ c. butter, melted
Mix butter and hot sauce in medium bowl; set aside. Toss wings in sauce mixture until well coated. Serve with blue cheese and celery, if desired.


Spicy Korean Sauce:For 2lbs chicken
  • ¼ c. gochunjang
  • ¼ c. soy
  • ¼ c. sugar
  • 1 tsp ginger
  • 2 tsp rice vinegar
  • 2 T water
  • Green onions and sesame seeds to garnish

Combine all but garnish and bring to a boil. Reduce to medium low and cook for 3-5 minutes.Mix butter and RedHot Sauce in medium bowl; set aside.


When I made these the other night I was in the middle of planning a multiplication lesson for my third grade class. Teaching from home is not really natural for me. Without the face to face interactions it I have to dig deep to find the personal connection to it... That is what inspired me to arrange my food into arrays and use it to teach hot wing and tater tot math.


I made buffalo wings last night.  I arranged the wings in 8 rows and each row had 6 wings.  How many wings did I make? If I divided the wings equally between myself, hey husband and my two kids then how many would each person get?


Monday, August 12, 2019

Lounging in the Desert

We spent our Spring Break in Dahab on the Red Sea several years ago while living in Egypt... I never posted these photos for some reason... Just saw the archived post and thought I'd put it out there.


Tamales and Karaoke