Showing posts with label kids cook. Show all posts

Wednesday, April 29, 2020

Ding Dong Ditch

Ding Dong Ditch....Remember that game? 

It went by other names as well... but basically it was a prank where kids would approach a stranger's door, ring the bell, and then run and hide. There are a variety of names for the game (depending on where you live). It is not a particularly creative prank, but at least it is a more innocent prank than some similar ones that were popular in my day like TPing houses (although this one might be welcome in these times of shortages) or leaving a flaming bag of nastiness on the porch.  

In this time of social distancing my daughters have been feeling low. Today my younger daughter asked if she could make cookies and deliver them to some friends. So tonight we rang the bell, stepped back to a safe distance, and waved..not exactly ding dong ditch... but a new era of ding dong ditch.  Random bell ringing with a prize at the end... not the giggling excitement of hiding in the shadows...  but cookies and a glimpse of a familiar face. And sometimes a gift for the bell ringers as well.


The cookies
Ding Dong
A tip for the delivery driver


The original Toll House cookie Recipe 

INGREDIENTS

    • 2 1/4 cups all-purpose flour
    • 1 teaspoon baking soda
    • 1 teaspoon salt
    • 1 cup (2 sticks) butter, softened
    • 3/4 cup granulated sugar
    • 3/4 cup packed brown sugar
    • 1 teaspoon vanilla extract
    • 2 large eggs
    • 2 cups NestlĂ© Toll House Semi-Sweet Chocolate Morsels
    • 1 cup chopped nuts


PREPARATION

    1. Preheat oven to 375°F.
    2. Combine flour, baking soda, and salt in small bowl. Beat butter, granulated sugar, brown sugar, and vanilla extract in large mixer bowl until creamy. Add eggs, one at a time, beating well after each addition. Gradually beat in flour mixture. Stir in morsels and nuts. Drop by rounded tablespoon onto ungreased baking sheets.
    3. Bake for 9 to 11 minutes or until golden brown. Cool on baking sheets for 2 minutes; remove to wire racks to cool completely.

Friday, May 24, 2013

Reckless Banana bread

As the weather heats up the bananas in my kitchen have started to brown a little faster. Although it is really too warm to bake I have been unable to resist the temptation to make Banana Bread.  The girls and I free styled this recipe: Guestimative measuring, reckless use of the wrong pan size, and creative ingredient substitutions made this a fun baking experience. My measuring cup broke and since we are moving in three weeks I haven't felt like buying a new one.  I've been using a coffee mug that is more or less a cup(although I have no way to measure it) and eyeballing the half cups and such. I also don't have a loaf pan so I found a basic recipe that used a cake pan. I always thought of baking as science rather than an art and so it never interested me before. Quick bread recipes, however, are the exception to this rule. You can substitute one mashed fruit for another, use a different type of oil, add nuts or chocolate chip... and as long as the consistency is basically the same and the things like baking soda are fairly accurately measured you can usually come up with something edible in the end.

Here is what we came up with (this time) but feel free to substitute, be reckless and experiment away...

 Reckless Banana Bread

  • 2 cups all purpose flour
  • 1 teaspoon baking soda
  • 1 teaspoon cinnamon
  • 1/2 teaspoon salt
  • 1/2 cup (1 stick) unsalted butter
  • 1 1/2 cup sugar
  • 2 eggs
  • 1 teaspoon each of vanilla extract and almond extract
  • 1 cup of mashed ripe bananas (2 large or 3 medium bananas)
  • 1/2 cup full fat sour cream or yogurt (flavored is fine... just reduce the sugar by a couple of teaspoons)

Method

1. Preheat the oven to 350°F (175°C) . In a medium bowl, whisk together the flour, baking soda, cinnamon, and salt.
2. Beat together in a mixer the butter and sugars. Beat in the eggs one at a time. Mix in the vanilla and mashed bananas.
3. Mix in half of the flour mixture, then the sour cream, then the other half of the flour mixture.
4. Spread batter evenly in a greased 10x15 baking pan. Bake at 350°F (175°C) for 25 minutes, or until nicely browned and the surface bounces back when you press it with your finger.


 I hope this puts a smile on your face.

Friday, August 19, 2011

Yaki Soba

After my birthday visit to Kobe Steak House where my daughters had Yakisoba... my oldest daughter has wanted to prepare noodles this way. So while at the store she picked out here favorite veggies and we grabbed a bag of soba noodles and gave it a try. It turned out wonderfully.
First we gathered together our ingredients. We had a 6oz bag of noodles, celery, carrots, scallions, and broccoli.
My daughter peeled and grated the carrots while I washed and chopped the rest of the vegetables.
While the noodles cooked we stir fried the vegetables in a little sesame oil. Once they were beginning to get tender... but still crisp we added the cooked noodles to the mix. Then we seasoned the noodles with our version of yakisoba sauce by adding some ketchup, vinegar, soy sauce and Worcestershire sauce. It seemed a little odd... but I combined several recipes based on what I had. I just added a little of this and a little of that and it tastes surprisingly similar to what we had at the restaurant.


We served it with dumplings and edamame and it was wonderful. It was a meal that both the kids and the adults loved and it was vegetarian as well. We will make this one again for certain.

Cheers,
Jenn


lollipops

I'm late this week in posting anything. I had a pretty busy week. More about that later. I hope everyone is having a great week.

Tuesday, May 17, 2011

52 weeks of happiness... Pizza with my daughter.

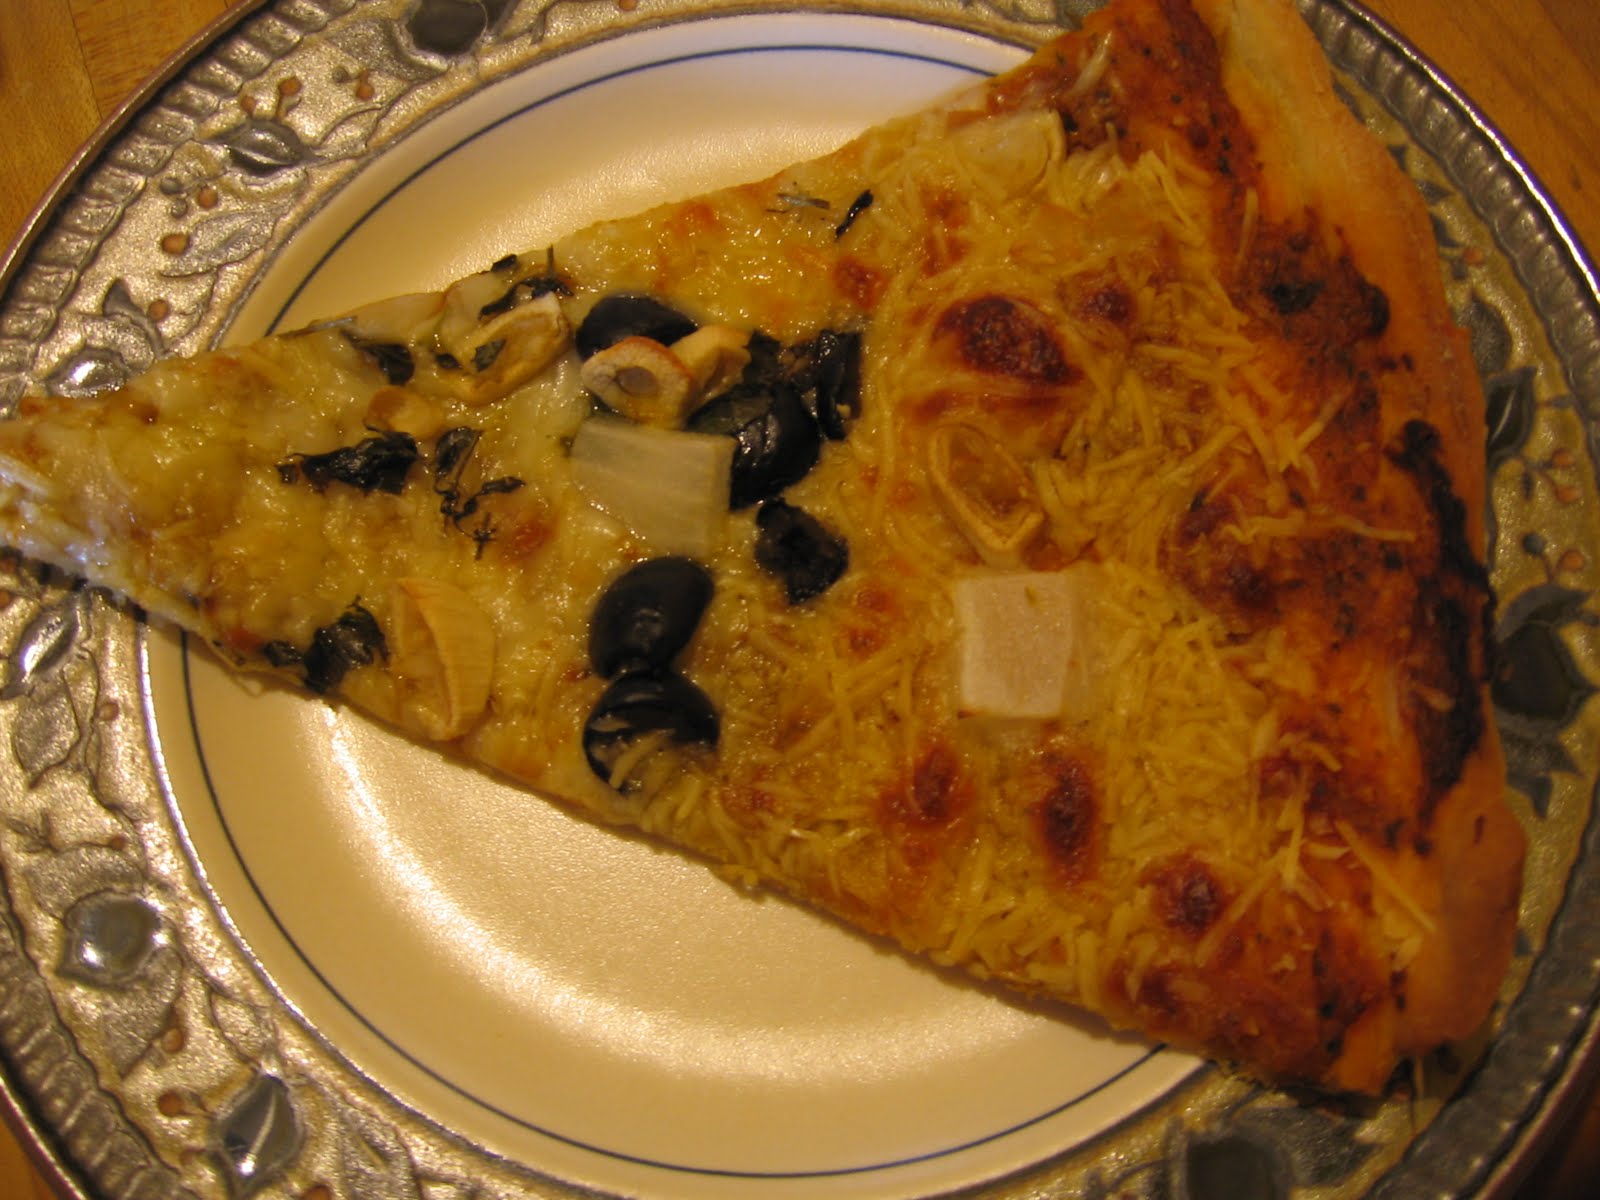
Not only did I get to have a fabulous pampering experience with my little L on Thursday... but I had a wonderful time after school making pizza with my big girl. She loves pizza and she asked me to make her night to cook pizza night.


She started out by preparing all the ingredients. She cut up olives and helped me get the other ingredients that we'd be needing out on the table so that we were ready to construct the pizzas.


While she cut olives and gathered things I started on the crust. To make things simple I bought a crust mix.... but I think next time I'm going to try and make the crust from scratch. My daughter was sad that I didn't know how to toss the dough like you always see in the movies. Maybe next time I'll try that.


Next we spread on the sauce. My daughter went with a classic tomato sauce... and I decided to get fancy and mix pesto and tomato sauce on mine.


Next we spread on the cheese. We used a mix of grated mozzarella and Parmesan. By that time the oven was and hot and we needed to get those pizza's in soon so that we could start cleaning up our mess and setting the table for dinner.


As for toppings we decided to go vegetarian this time. My daughters LOVE black olives so they wanted to keep their pizza simple. Simplicity isn't part of my vocabulary, however, so for my pizza I used olives, garlic, onions, and fresh basil from my garden.


The pizza's came out lovely and they made the whole family smile... except for my little one who was in bed with a fever instead of enjoying dinner with the family. Thankfully we had leftovers and she had some for lunch the next day.


This will be the tenth post in my 52 weeks of happines project. Please stop by Leigh vs. Laundry and join the fun!

Another reason to be happy this morning...


I have the pleasure of being Avant Garde Parenting's parent of the week. Thanks!


Tuesday, May 3, 2011

Happiness Project: Sunday! Sundae!

The Ice Cream Sundae seems innocent enough: Ice cream with a bit of syrup poured over it, a generous dollop of whipped cream, possibly some nuts and then a cherry perched on top. The story behind it's origin, however, is a story that is hotly debated. There are two communities in the US that are at the front of this war. They are Two Rivers, Wisconsin and Ithaca, New York. The Two Rivers Wisconsin story goes like this: Due to blue laws sodas were outlawed on Sunday. To get around this, a local soda fountain started serving a "dry" soda that they called a Sunday. It was ice cream topped with chocolate sauce... a handful of berries was added to make the whole thing seem a bit more wholesome. The other community that claims to have stared the Sundae fad is Ithaca, New York. Their story is not about a legal smoke screen designed to deceive the religious right but rather it is a morally salubrious tale about a Unitarian minister inventing this after church treat with a local soda jerk.

If you are a foodlore nut like me you might want to read more about the history of the sundae at The Official Website of the Ice Cream Sundae. If you just like to eat and want to get scooping you can simply follow the lead of Thing 1 and Thing 2 here and make a Sunday Sundae. All you'll need is some ice cream, whipped cream, chocolate sauce (or sauce of choice...I recommend against sweet and sour... but to each his own), and some cherries. You might also want some chopped nuts, sprinkles or bits of candy.


Sunday, May 1, was National Chocolate Parfait Day. And there was no better way to celebrate than with this layered frozen treat of perfection.


For those of you who think that they have figured it all out... The parfait DID NOT come before the Sundae... so we can't give the French credit for any more culinary masterpieces. The parfait traces it's origin back to 1894... the ice cream sundae on the other hand was invented somewhere around 1892. So maybe the folks from Ithaca and Two Rivers can just join hands in solidarity against the French. It has brought folks in this country together before...Let's give it try.


You can still win this cute toy by stopping by Monday's post and making a comment. The contest will be open until Friday and I will announce the winner on Monday at next weeks Makeover Monday.

Friday, April 29, 2011

Tacos and Tostados

This could be a photo from my childhood... the divided Pyrex cookware with beans on one side and taco meat on the other. Taco meat nestled in a crispy perfectly formed shell with lettuce, tomatoes, cheese and mild salsa poured on top. I haven't had this type of taco in a long time. This type of taco just doesn't exist in Mexico. Sure they have crispy shells and they have a ground meat dish called picadillo... but they are about as similar to this dish as those egg rolls you got on the Chinese buffet last night are to ones purchased at a street stall in Guangdong providence in China.
That said I have fond memories of taco night and so I thought that it might be a good dish to try cooking with my kids. A couple of weeks ago we made tostadas and they were a huge hit. The most difficult part of the whole meal was trying to eat them without them falling apart.


Just look at that concentration!

For taco night we simply browned some turkey meat. We added a seasoning packet and there you have it... Nothing could be easier. My older daughter was very proud of herself. I don't often let her cook things on the stove, but now that she is tall enough she has been able to help more freely in the kitchen.


Next we chopped up all the goodies to go on top: Lettuce, tomatoes, and onion. We grated cheese and put the salsa and other condiments on the table.


My big girl got the taco shells all lined up and ready to heat in the oven.


She put some lime juice on the Jicama salad.


She then set the table and took this photo so I could post it here.


This is the Jicama with chili powder on half (for the adults) and the other side plain for the kids. We through in some lime and orange slices.


Here is the finished plate with beans, rice.


Cheers,


Jenn


Tuesday, April 19, 2011

Spaghetti and Meatballs

I haven't posted in a full week. We got a new computer last week and I have been spending most of my computer time transferring data and getting it ready to use. I'm very happy to finally have a machine that doesn't blue screen daily. Here are some photos and a recipe from last week's menu... and now that I'm back in business I should be posting regularly again.

Every week my daughter asks for it, so I thought it was about time that she learn how to make it. My girls LOVE spaghetti and meatballs and while I have posted about it in the past I looked back and realized that I've never given my recipe. So here it goes.


First you mix together the ingredients:


1 lb of ground beef (I use lean sirloin 90/10 or the natural hormone free beef. To me good beef is the most important part of making great meatballs)


1/2 C. breadcrumbs


1/2 C. Parmesan cheese


2 eggs


optional add-ins: minced onion, minced garlic, minced herbs such as parsley, oregano or basil. You can add any or all of these in, but be careful not to add too much. You don't want your meatballs to fall apart.


Next form the meat into balls. Add them to your skillet and brown them on all sides. I like to cook them until they are almost cooked through.


Add your favorite pasta sauce (homemade or from a jar) and simmer until the flavors meld and the meatballs are cooked all the way through. This step can also be done in the crock pot or oven if you'd like.


Cook up your favorite pasta and there you have it... Spaghetti and meatballs! My daughter swears that they are the best meatballs in the world.


While the meatballs were simmering and the pasta was cooking my daughters made up this lovely fruit tray. We also served a nice tossed salad with our meal. I try to include fresh fruits and vegetables every night.


They also set the table and filled it with all the necessary condiments and dressings. My girls did such a nice job last week with their meal preparation that I have them down for making tonight's dinner. Tonight we are going to make tostadas.


Tamales and Karaoke