Showing posts with label sauce. Show all posts

Wednesday, May 20, 2020

What's the Difference Between a Spring Roll and a Summer Roll?

SEASONING!

Actually that is not the difference at all... but I can't resist a corny pun.

Summer Rolls, or Gỏi cuốn  in Vietnamese, are the perfect combination of fun and flavor. They are light and full of healthy ingredients. They are the perfect meal for a hot day. We always make them at the dinner table so each one is custom made and everyone has a blast making them. I always thought these were called these spring rolls, but spring rolls are crispy and have a wheat flour skin.
Banh Trang Spring Rolls Skin
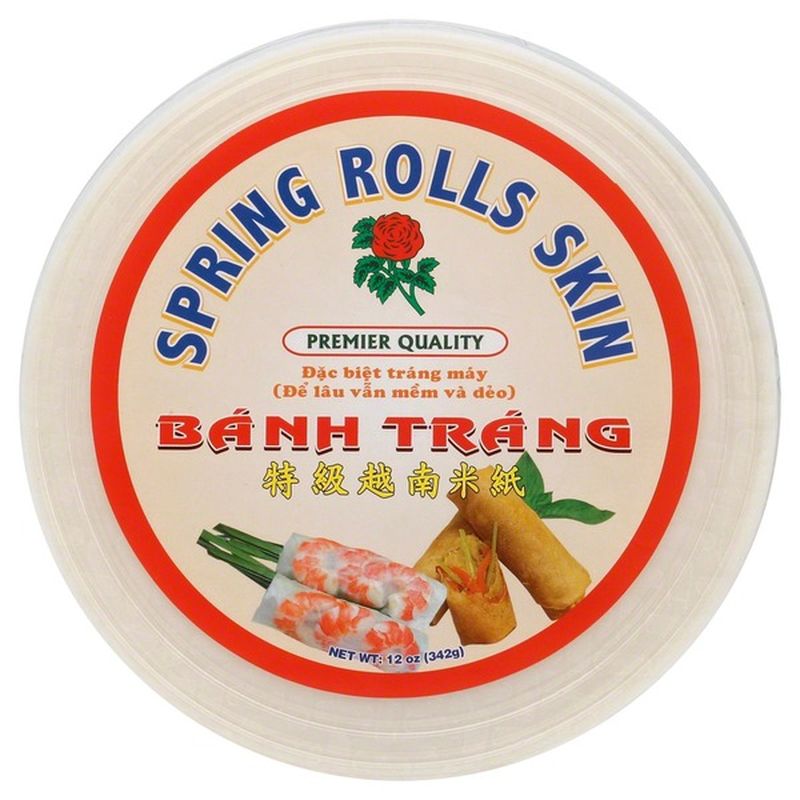
Summer rolls are wrapped in  a rice paper skin like the one pictured above.  You simply soak the wrapper briefly and then fill it with whatever you want. There really isn't a recipe.

Rice Noodles (Vermicelli) — Rice, Noodles and Rice Paper — Asian ...


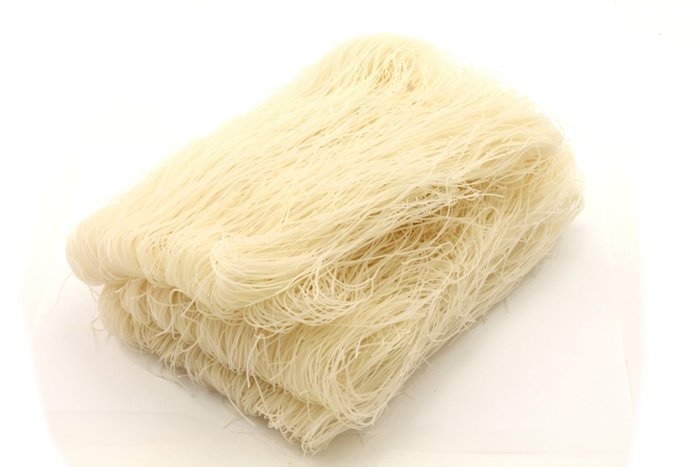
For mine I simply cut cucumbers, green onions and carrots into match sticks.  I boiled shrimp, peeled them and then cut them in half. I cooked some rice noodles and grabbed some lettuce leaves out of the fridge. Then I made a sweet chili sauce and we were ready to roll... literally. The only hard part is resisting the urge to overstuff them... if you put too much in them it is difficult to roll them up.

When you roll it simply place your soaked wrapper on a damp towel and roll it up like a burrito: Fold one end down over the filling, roll it up and then fold the other end down... and wah-la... a perfectly rolled summer roll. 

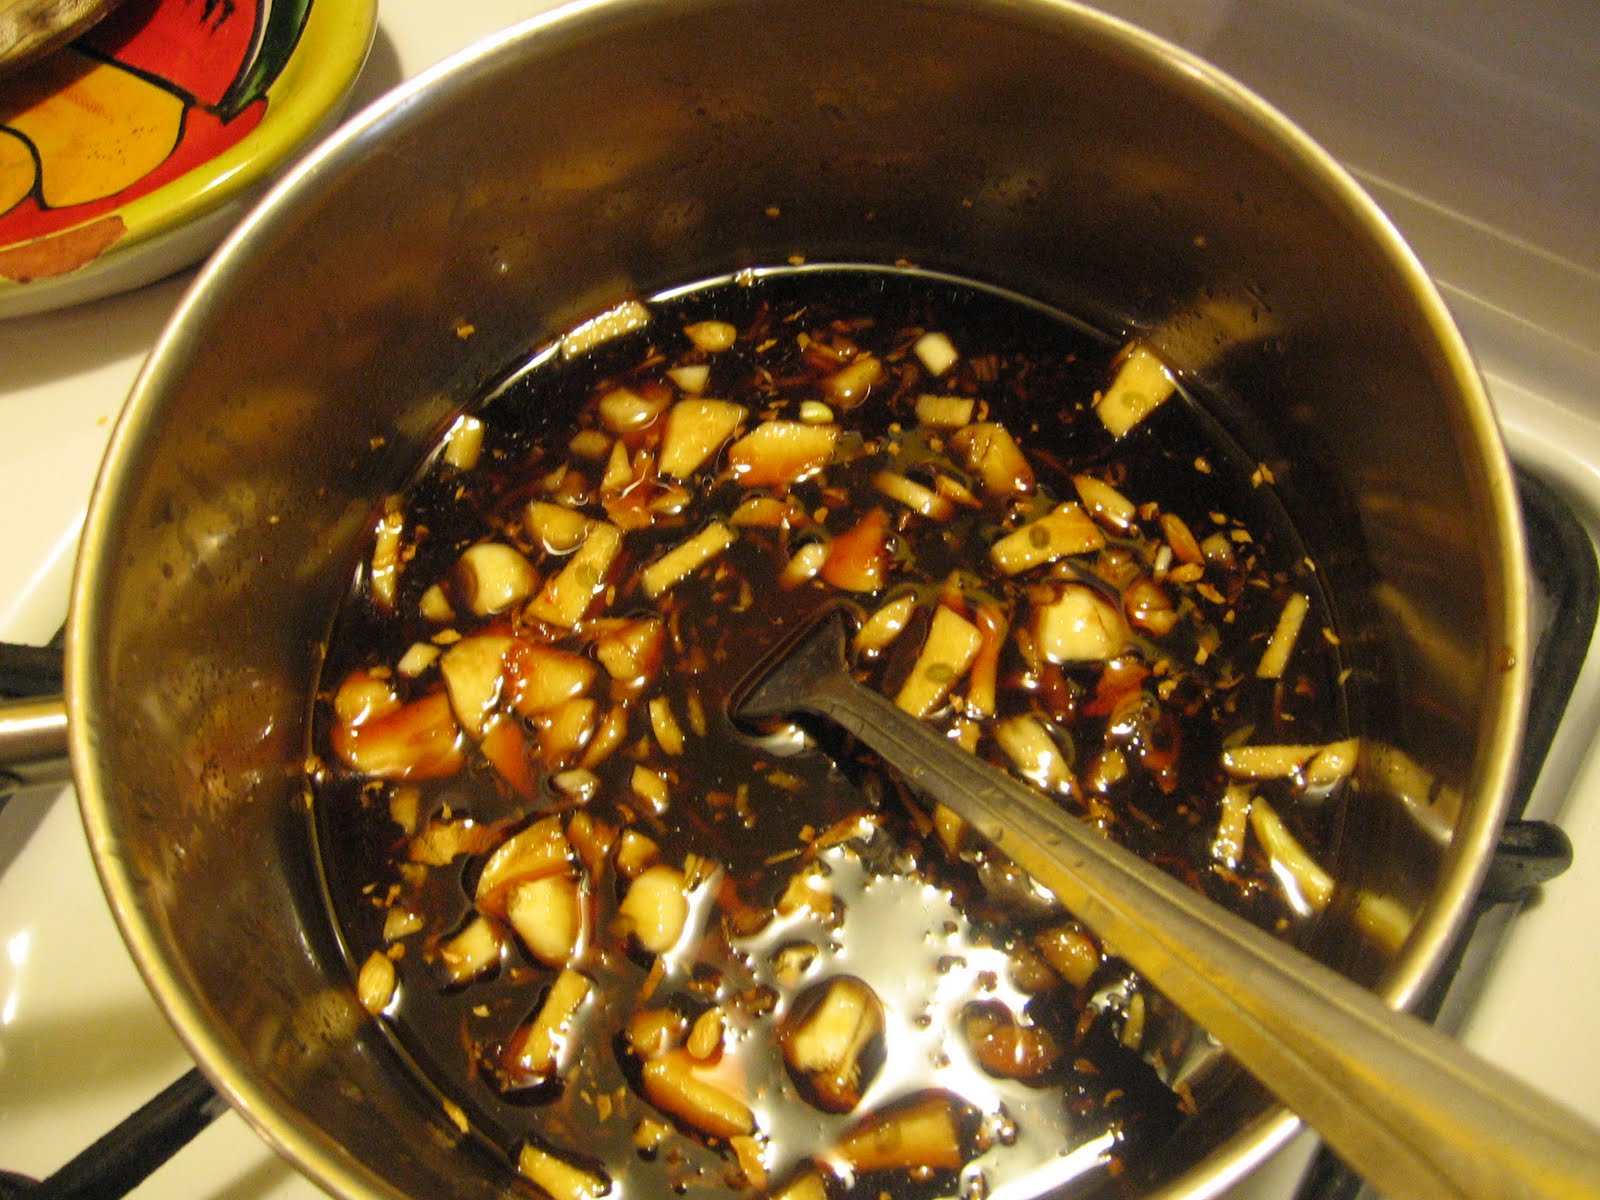
I made this chili sauce to go with it:
1/4 C. rice vinegar
2 T. water
2 T. sweetener - I used honey (the recipe called for maple syrup) but I think next time I'll use sugar
1 T. soy sauce
1 clove garlic
1 inch ginger, minced
1 t. red pepper flakes
juice of one lime

The recipe I modeled this after was vegan most recipes use fish sauce instead of the the soy... it's all up to you.

You can also make a peanut sauce... just google it.

What would you like in your summer roll?


Monday, May 4, 2020

Go To Your Frappe Place!

Sadly, I can't go to my Frappe place right now.  With coffee shops closed (other than drive thru services) I have to find other ways to support my local shops. I do that by buying beans to make coffee at home. Most days I just like to brew a cup in my stove top espresso maker... or better yet have someone else brew it and bring it to me in bed. Lately, however, my daughter has been making frappes at home. It is a wonderful way to enjoy a cup of coffee even on a hot day. She likes to use caramel sauce, but you can use other flavors if you like.  Many recipes call for instant coffee, but I prefer it this way.
Here is her recipe:

1 C coffee
1 C milk
2 C ice
vanilla extract, to taste
caramel sauce, to taste
sugar, to taste
whipped cream

Blend it all together, pour it in a pint glass and top with whipped cream and a little caramel sauce.  Enjoy!

Easy Caramel Sauce:


I C. packed brown sugar
1/2 C. butter
1/4 C. milk
1 t. vanilla

Bring brown sugar, butter, and milk to a gentle boil and cook until thickened, 1 to 2 minutes. Remove from heat; add vanilla extract.


Tuesday, April 28, 2020

When Buffalos Fly

It has been a long time since I have written a blog entry. I am really out of practice... and I am not really sure why I decided to write my first entry in years about Buffalo wings... but here it is. I am going to try to write something daily. Typically this blog was about food and food lore, but for now I think I'm just going to write about anything that I find interesting.

I often feel bored right now, but feeling bored doesn't have to be a bad thing. Sometimes it can force you to try new things or look at something common and day to day in a new way. Maybe if I write about it I will find ways to make the best of this time and put my boredom to good use.

Buffalo Wings

I love making hot wings. They are so easy to make at home and it makes things seem a little more festive. Especially now that going out to eat is not a possibility it is nice to add a little festive into the mix. 

Buffalo wings were invented at a bar in Buffalo, New York in 1964. They weren't popular outside of New York until the mid-80s. Now it is hard to imagine a game night party without them. They are usually served with blue cheese and celery. Although here in Texas you are just as likely to see them served with Ranch.

The classic buffalo wing sauce is made with butter and chili sauce, but now that there are so many restaurants devoted entirely to hot wing there are countless possibilities. They range from the tame all the way to the 5 alarm fire variety. Here are the two I make the most. If you have a good recipe for hot wings then let me know in the comments. You can even share a link to your recipe.

Here is how I make mine:

To cook wings-

Preheat oven to 450°F. 


Arrange wings on large foil-lined pan. Bake on lowest oven rack for 30 minutes or until crispy, turning once. I usually make a lot and so I can sauce them two different ways.


Classic Sauce:
  • For 2 ½ lbs chicken
  • ½ c. hot sauce 
  • ⅓ c. butter, melted
Mix butter and hot sauce in medium bowl; set aside. Toss wings in sauce mixture until well coated. Serve with blue cheese and celery, if desired.


Spicy Korean Sauce:For 2lbs chicken
  • ¼ c. gochunjang
  • ¼ c. soy
  • ¼ c. sugar
  • 1 tsp ginger
  • 2 tsp rice vinegar
  • 2 T water
  • Green onions and sesame seeds to garnish

Combine all but garnish and bring to a boil. Reduce to medium low and cook for 3-5 minutes.Mix butter and RedHot Sauce in medium bowl; set aside.


When I made these the other night I was in the middle of planning a multiplication lesson for my third grade class. Teaching from home is not really natural for me. Without the face to face interactions it I have to dig deep to find the personal connection to it... That is what inspired me to arrange my food into arrays and use it to teach hot wing and tater tot math.


I made buffalo wings last night.  I arranged the wings in 8 rows and each row had 6 wings.  How many wings did I make? If I divided the wings equally between myself, hey husband and my two kids then how many would each person get?


Thursday, July 28, 2011

Thai Chicken Two Ways

In this summer heat I like to look for recipes that keep me out of the kitchen... and this is the perfect meal for that. If you double the Grilled Chicken recipe you can have a meal for 4 people two nights in a row and only have to cook one night.

Here is the Thai Chicken the first night. I served it with carrot salad and edamame. The salad requires no cooking... you cook the chicken outside... and I steamed the edamame in the microwave. This kept my kitchen nice and cool in the Texas heat.


Thai Garlic Chicken

4 cloves garlic
4 boneless chicken breasts
1 T. ginger root
1 lime (juice and zest)
3 T. oil
1 T. soy sauce
squirt or more of siracha sauce
2 T. cilantro

Place all (except chicken) in blender and puree until smooth. Pour over chicken and marinate for a couple of hours. Grill chicken.

Day 2: Thai Salad

The next night all I needed to do was warm up the left over chicken, whip up some dressing, boil some potatoes and eggs (they go into the salad), and then I made a nice green salad with all the ingredients my family likes. I like to top the whole thing with crunchy chow mein noodles for a little crunch.


Dressing for the salad

6T. peanut butter
1 C. boiling water
4 T. cider vinegar
1 T. sugar or honey
A little soy sauce a teaspoon or 2 (to season)
3-4 cloves garlic
crushed pepper, to taste
2 t lemon or lime juice

Whisk together peanut butter and water (mix it in slowly...you don't use all if the dressing gets too thin... there are more liquids to add). Add remaining. Taste for seasoning and adjust as you like.
Cheers,
Jenn

Wednesday, June 8, 2011

I Love Cooking Shows!

Last night I was sitting in bed watching the first episode of Oliver's Twist (a cooking show) and I thought to myself... I LOVE COOKING SHOWS. When I'm away on vacation or just staying in a hotel for some reason I always stay up late watching the food network. I don't have television at home so I watch food and cooking shows (from several seasons ago) on Netflix. The selection isn't that great so I have watched most of the episodes of Anthony Bourdain: No Reservations already. I love the mix of travel and food on his show... although I'm not always fond of his taste for organ meat and strange foods I do enjoy his spirit of adventure. That is why I was so glad to see the Oliver's Twist show... I was about to run out of food TV on instant watch.
When I'm sick of what Netflix has to offer I can check out old episodes of Julia Child's show, The French Chef, at the public library. Before TV went digital and I could at least get a few stations in with my rabbit ears I was fond of watching shows like this on PBS... One of my favorites was Two Fat Ladies . Their motorcycle and sidecar cracked my up... and although I don't eat foods like the ones they cook (in fact when I watched the show I was a vegetarian)... I loved their down to earth style.
My favorite cooking/food show of all time, however, has to be the original Iron Chef. I dream of cooking in kitchen stadium someday. Sometimes I even pause while cooking, bite into a fresh and crispy bell pepper, and smile at my imaginary audience.


Last night I even whipped up dinner Iron Chef style.

I had placed chicken breasts in the fridge to thaw Monday afternoon and when I took it out to marinate it for last night's dinner I realized that I had purchased chicken wings by mistake. I had intended to do a Thai garlic marinade and while that would have worked out fine. I really wanted to make something more suited to the ingredient. I decided to Iron Chef my own Asian style chicken wing glaze... Here is what I did.


I started by adding salt and pepper to the wings. I then gave them to my husband to grill. He cooked them on a medium-hot setting for 6-8 minutes per side. He checked the temperature at this point and decided to let them go just a touch longer.

While he was doing this I pulled a selection of sauces out of my fridge and began to whip up my glaze.

I used an Asian lemongrass BBQ sauce (about 1/2 cup), the juice of two lemons, grated fresh ginger, 3 cloves of garlic and a generous amount of sriracha sauce to give it that kick. I simmered this on low while the chicken was on the grill. The BBQ sauce was very sweet so it cooked down to a nice sticky glaze.

I then poured the glaze over the the chicken wings. I set a few wings aside for the kids and just added teriyaki sauce to theirs. They aren't fond of spicy foods so I thought I'd spare myself the work of making PB and Js while trying to eat dinner.


Then we sat down to dinner. Chicken wings, fried rice, dumplings and cucumber salad.


We had watermelon for dessert. Mmmmmmm!

Cheers,
Jenn

lollipops

Tuesday, March 22, 2011

Pad Thai

Pad Thai is probably one of Thailand's most famous dishes worldwide. While it is certainly popular in Thailand, it is even considered by some to be their national dish, it has it's origins elsewhere. It probably first appeared in Vietnam and was brought by merchants and popularized in the 30s in 40s... To find out more about the history of Pad Thai just follow this link. But enough about the origins of Pad Thai... Let's get serious and start cooking!

Pad Thai

12-16 oz rice noodles
oil
4 cloves garlic
1 container firm tofu, cubed
6 T. lemon juice
6 T. fish sauce (there are many recipes and ideas for vegetarian options available... just google it!)
2 T. sugar
3 eggs
4 oz. bean sprouts
6 T. roasted peanuts, crushed
8 green onions, sliced thin
4 T. cilantro, chopped finely


It is important to soak the rice noodles first. The package I bought contained 16oz of noodles so I just soaked the whole package. I didn't end up using it all... but I wanted to make sure I had enough. In the past I've had some difficulty with rice noodles... this time, however, I found this helpful tutorial and they came out just right. Just soak them in hot (not boiling) water for about 15-20 minutes and then drain. They will seem a bit tough at this point... but once you add them to the wok with the sauce they will soften up and become a wonderful texture.


Next you will need to assemble your ingredients. Mix together the fish sauce, lemon juice, and sugar in a small bowl. Dice the tofu and chop the garlic. I also prepared the bean sprouts, peanuts, green onions and cilantro and put them all in a bowl to add at the end of the cooking time.


Now it is time to cook. First you will cook the garlic until it is golden. Next gently stir in the tofu. At this point I also added in a couple of handfuls of chopped up celery, cabbage and carrots to add color. You can add whatever you like.


Reduce the heat and then add in the sauce mixture. Stir until the sugar is totally dissolved. While this cooks you are going to want to scramble the eggs. I made a small omelet in a separate pan and then rolled it up and sliced it into thin strips.


Add your noodles at this point and stir until the sauce is absorbed and the noodles seem fully cooked (but not mushy). Now all you do is add the sprouts, peanuts, green onions and cilantro and stir gently to mix. Top with eggs and garnish with lemon wedges and cilantro.

Enjoy!

Jenn

Thursday, March 3, 2011

Enchiladas Verdes

Verde sauce is popular in both Mexican and Tex-mex food. My personal recipe for verde sauce probably differs since I saute the vegetables rather than cooking them in water. I like the flavor that comes from the slight caramelization (is that a word?) of the onions and garlic. I make my salsa this way as well. Most recipes also include cilantro... I usually include it... but since I was going to serve it with pico de gallo I thought that it might be a bit of a cilantro overkill.

Here is my version of Enchiladas Verdes.....


You start by making the Verde sauce. I do this by sauteing 1/2 an onion, several cloves of garlic, two poblanos and at least a dozen tomatillas until things are soft and golden. You can make it a little spicier if you like... by adding jalapenos or serranos... but I was making it for my kids so I kept it on the mild side and just put pico de gallo on the table.


Next puree in a blender with some water. I like to add a little water to the pan I cooked the veggies in...then I swirl it around to get all the tasty bits off the bottom. This not only adds flavor but it adds color as well... Next just add a little salt and your done. That is all there is to making Verde sauce... you can stop there if you just want a salsa for the table... but I was making enchiladas... so here is what I did next.

Next your going to assemble your ingredients and start some oil heating on the stove. I filled mine with chicken... but if you want to make them vegetarian just fill with cheese... or you can even make them vegan if you fill them with sauteed vegetables or beans.


Here is the shocking... calorie rich step... but hey I've tried it many ways and this is truly the best way to get the tortillas the right texture for rolling into enchiladas. I've tried dipping them in sauce and this usually turns them into mush... I've also tried heating them in the microwave or in a skillet without the oil... and they just don't get pliable enough.... so I dip my tortillas in the heated oil for just a few seconds and then quickly and carefully (they get hot) wrap them around the ingredients.

Next lay them out in a neat little row on top of a layer of sauce.

Top with sauce and cheese and they are ready to go into a 350 degree oven for about 30 minutes. I like to cover mine with foil and then remove it for the last 10 minutes of cooking.


Now you have a pan of steaming hot enchiladas.... so it is time to eat.


I like to serve mine with a nice green salad... some beans, plenty of pico de gallo to garnish and a cold cerveza of your choice. We had strawberries and grapes served with a chocolate-mint cookie for dessert.
Cheers,
Jenn


Tuesday, September 14, 2010

Corina and Ceci's Salsa


I lived in Guanajuato, Mexico for a year and a half as an English teacher. My husband and I decided to move there after vacationing there with friends. We spent a year saving and preparing and then took off on one of the most amazing adventures of our lives. It was an important time in my life and it was a fun time too... I changed a lot while I was there and I learned many things as well.

Here are just a few of the many things I learned:

how to light the pilot light on a hot water heater
how to speak Spanish well enough to get by
the best way to get around a donkey that is blocking your path

the most delightful way to spend a rainy afternoon
how to wash cloths on a roof top
where to find the best taco stand
how to cheer on my favorite soccer team in Español
how to drink out of a plastic bag
the best ways to truly relax
how to find a reason to party EVERYDAY
the best way to choose an avocado
and last but certainly not least.... how to make Ceci and Corina's salsa

Most of these things I can't really share in a simple blog entry... (except perhaps for how to light a pilot light)...because most of these things you have to discover for yourself... but I can share Corina and Cecilia's recipe for salsa with you....

Ceci and Corina came from Mexico City and they lived with us during our last few months in Mexico. They were great friends and excellent roommates and they made a mighty mean salsa. I'm sure I have changed it slightly with the passage of time... but this is the recipe as I remember it and as it has evolved (like all good folk recipes do) in my kitchen.

First you put tomatoes, chilies, onions, and garlic in a pan with a little oil and saute them until they caramelize and the tomato skins begin to blacken slightly. The amounts of these ingredients depend on your personal taste... but here I have 4 tomatoes, one onion, 6 cloves of garlic, 2 jalapenos, and 2 hatch chilies.... Ceci would say "Esta buena pero falta pica"...it's good but it isn't spicy enough... but then again that was a running joke in our house until the day Paul put handfuls of habaneros in and rendered her speechless for awhile...Then eyes watering she croaked out... "Esta buena"...


Once you have things nice and cooked you just throw the whole thing in a blender and add salt to taste and a little water. I like to put the water in the pan first and stir it around so that I take advantage of all the stuck on goodies in the pan. It also gives the salsa a nicer color.


Once it is blended it is ready to serve with chips, tacos or anything that can use a little kick.

Buen Provecho!

Monday, August 23, 2010

Hatch Chilies

The New Mexico, or the hatch chili, is an aromatic pepper that is milder than the jalapeno. Like the jalapeno, however, it is a versatile chili that compliments many dishes. It can be served a variety of ways, but it is best when roasted and peeled. The green chili is central to New Mexican cooking. Right now it is Hatch chili season and they are being celebrated all over the Southwest. They are really inexpensive right now... so I like to buy a lot, roast them, and freeze whatever I don't use. The trouble is I think of so many ways to use them that I rarely have any left in reserve once the season is done.


How to Roast a Pepper: Place the oven on broil…or even better heat up the outside grill. Puncture each chili to prevent explosion. Place peppers on a cookie sheet or if cooking outside place directly on the grill. Cook until the skins begin to blacken and separate. Turn occasionally.


Remove from heat and place in a bag or a bowl with a lid to sweat. After 15 minutes or so peel and discard skin. If you wish to freeze some for future use leave skin on until you are ready to use.


New Mexico Green Sauce

If Hatch chilies don't happen to be in season right now... or you just don't live somewhere where they are common you can substitute other mild peppers like Poblano peppers for the hatch chilies. This is a good sauce for eggs, enchiladas, and burritos or just as a dip for chips.

6 New Mexico or Hatch chilies
1 C. warm water
2 T cooking oil
3 T flour
2 cloves garlic, minced
2 Cups veggie broth
1/2 small onion diced

After you roast the chilies in the broiler or on the grill and place them in a bag to sweat you will then want to remove the peel and seeds. Place 3 chilies in the blender with water and blend.


Sauté the flour in oil until slightly brown. This is the roux that will thicken up the sauce when you add the remaining ingredients.


Add garlic and onions and sauté until translucent. You can also heat up the broth at this time. You can use either vegetable broth or chick broth depending on whether you wish to make this a vegetarian meal.


Add other ingredients and cook until thick. Dice the three remaining chilies and add to mix. Serve hot or cold. Or use to top a New Mexico Style Burrito.


New Mexico Corn and Zucchini

2 t. veggie oil
3 New Mexico chilies-Roasted, peeled, etc…
1 Chopped onion
2-3 ears of corn
3-4 Cloves of garlic, minced
2 zucchini, sliced

Heat oil and sauté onions and garlic until translucent. Add the chilies, corn and zucchini. Cook until zucchini is tender, but not falling apart. Add salt and pepper to taste. Use as a side dish or a filling for tamales and burritos.

New Mexico Style Burritos
This is a recipe my husband Paul likes to make. The recipe is based on a burrito I ate at a small brewpub in New Mexico. The pub called the burrito “The Fatty”… and it is fat indeed!

1 recipe sauce
Burrito size tortillas
1 can black beans
1 recipe New Mexico corn and zucchini
Potatoes fried with onions, garlic and cumin. (cooked well-almost like mashed)

Wrap beans, potatoes, and veggie in tortilla and top with sauce. Garnish with cilantro and top with cheese if you wish. I also like to just put beans and potatoes in the burrito and serve the corn and zucchini as a side dish. You can stuff the burrito with whatever you wish... just make sure to top it with plenty of sauce!

Tuesday, April 20, 2010

Garden Fresh Tomato Sauce

A friend of mine was going out of town the other day and she brought over a bunch of fresh produce so that it wouldn't go to waste. One of the things she brought me was a bag of five or 6 vine ripened tomatoes that were about to go bad.... I decided to make up a batch of fresh pasta sauce and MAN was it good.

Here is what I did. I blanched the tomatoes in boiling water to loosen the skin and then peeled them. I pulsed them in the blender quickly to chop them up...but you could easily do this part by hand. I then sauteed onions and garlic until they were golden. I added some fresh Italian sausage and when it was completly browned I added the fresh tomatoes, 2 T. tomato paste, handfuls of fresh basil and oregano from my garden, salt and pepper to taste, and sliced black olives. I let it cook for about 45 minutes and then served it with steaming hot pasta. The sauce was so sweet and wonderful. It beats any jarred sauce hands down. Other wonderful additions would be red wine, sliced mushrooms, or any grated or chopped vegetables to add extra taste and nutrition. This will be great when my garden fresh tomatoes are ready to harvest. MMMMMMMmmmmm

Thursday, March 25, 2010

Pleased to meat you....


On this day in history in 1966 the Beatles posed with mutilated dolls & butchered meat for the cover of the "Yesterday & Today." I can't think of a better way to celebrate this than by talking about MEAT!


I grew up in the 70's and as a result I ate my share of ground beef. Regular staples in our household included; macaroni and meat, chili (or as I knew it-taco soup), hamburgers wrapped in bacon, tacos seasoned with McCormick taco seasoning, and a wide variety of other delicious recipes cut from the pages of ladies magazines. My mother provided very healthy and balanced diet for us growing up...healthy cereals , whole wheat bread, yogurt, fruits and veggies... but in the 1970's ground beef was the King for feeding a hungry family... and my early diet was shaped by this fact. So in 1988 when I turned to a life a vegetarianism I expected my family to be a little shocked. To my surprise they took it really well. In fact my mother became a vegetarian too. But this is not about my years as a vegetarian... and later a pescetarian. This is about carne and my transition back to being a carnivore.


In February of 2002 I was living in Mexico. I had been living there for more than 6 months already and I had done so as a vegetarian. Sure I had broken down once and dined on Rotisserie chicken... but overall I didn't find it that hard to maintain the diet I had been living by for 15 years. One day in that fateful February my husband proposed an experiment... A semana de carne... a week of meat. During this week we would sample a new meat dish from Mexico everyday and see where it took us. We did not start out slowly. Our first day we dined on barbacoa de borrego (BBQed sheep)... and during the week we sampled Chorizo, bistek, tacos de cabeza, tacos de pastor, and pica dillo. I expected to have digestive woes based on a belief that so many years as a vegetarian would strip my body of the enzymes needed to digest meat... but either this theory is a myth or the small amount of fish I consumed over the years kept my enzymes in check. I didn't end the week untouched by the experience, however... I was transformed. I became an unrepentant meat eater again... and I haven't looked back.

Tacos Bistek


skirt steak or bistek sliced thin
corn tortilla
salsa
limes
onions
pico de gallo
To make authentic Mexican style tacos salt beef or marinate it in a little soy sauce or salsa Inglesa (Worcestershire) . Cook it on the grill until fully cooked. The trick is to cut the beef into very small pieces to insure a tender texture. Place the cut meat on corn tortillas and serve with a variety of salsas, limes, grilled onions and pico de gallo.

Salsa Chile Guajillo

This simple recipe salsa does wonderful things for grilled meats or tacos. If
you have any left over, it will last in the refrigerator for several days. We
had friends visiting from Denmark over spring break and I made this salsa along with pico de gallo and my standard salsa to go with Mexican style tacos... It was wonderful!


12 chiles guajillos, seeds and veins removed
1 large tomato, roasted and peeled (I was out of tomatoes so I used about 1/2 c
- 1 cup of tomatoe sauce)
1 clove garlic (I used 3)
2 teaspoons of salt
1/4 cup water (It turned out a bit thick so I added about a 1/4 c more to thin
it out)

Directions for Salsa Chile Guajillo
On a comal or iron skillet, toast the chiles well, about 2 minutes. Rinse but do
not soak.

In a blender, puree the chiles withthe tomato, garlic, salt and water.

Tamales and Karaoke