Wednesday, December 22, 2010

I'm Dreaming of a Healthy Christmas...

Every year since my oldest has been old enough to hold a rolling pin I have had her help me make Christmas cookies. This year, however, a flu like illness has invaded our home and I'm not sure that we are going to get around to baking anything before the holiday. We also have a gingerbread house all ready to assemble... but I don't want sick kids in the kitchen.... so until my daughter is well I'll just post my holiday cookie recipes rather than bake them...

Black Pepper Christmas Cookies

I make these cookies every year instead of gingerbread. The black pepper gives them an interesting and unique twist. I generally make these cookies and molasses cookies every year for the holiday season.

3 C. sifted all-purpose flour
2 t. baking soda
3 t. ground ginger
2 t. ground cinnamon
½ t. ground cloves
½ t. ground black pepper
1 C. soft butter
1 ½ C. sugar
1 large egg

Sift flour and baking powder. In another bowl mix together the next five ingredients. Gradually blend in the sugar and then beat in the egg. Gradually stir in the flour mixture. Chill dough several hours or overnight. Roll dough on lightly floured surface to 1/8-inch thickness. Cut into desired shapes. Bake in a preheated oven (375 degrees) or 8-10 minutes. They are ready when the edges are lightly browned. Cool on wire racks and decorate as desired. Yields about 5 dozen.

Here is a photo from 2008:


And 2 from 2009:


Hopefully I will have some to post from this year soon... The heck with a white Christmas... I just want a healthy one.

Friday, December 17, 2010

Tamales for Las Posadas

Yesterday (the 16th) was the beginning of Las Posadas in Mexico. It is a nine day celebration where people travel from house to house carrying candles and singing traditional songs. Each house is suppose to refuse the pilgrims entrance until the final destination is reached (the house where the party is being held). It is a reenactment of Mary and Joseph's troubles finding lodging on that Christmas Eve so long ago.

In honor of Las Posadas I am posting my Tamale recipe... I am also posting a link for a recipe for Champurrado ... which is a chocolate beverage that is often served with tamales at this time of year.

The Tamale Experience

Growing up in Texas it is impossible to escape Tex-Mex influences in diet and tradition. One of my favorite holiday traditions has always been consuming tamales in large quantity every Christmas Eve and New Year’s Eve. When I became a vegetarian I thought that this tradition had come to an end. While I am no longer a vegetarian I still enjoy and in fact prefer vegetarian tamales. In Texas there are a few commercial pre-made vegetarian tamales on the market, but for the most part tamales are made with lard and filled with pork. In central Mexico, however, I found that a mixture of chilies and cheese is a very popular fillings. However you like your tamales the following recipe will help you get started. Just remember tamale making is no easy task. It takes a lot of time and a lot of willing hands in the kitchen.

“The creation of tamales requires several key things: A kitchen with adequate counter space, several people with long attention spans who are willing and happy to work together, about 12 pounds of corn masa, whatever wild fillings you might come up with and a full day of HARD work.” Paul

12 lbs wet masa
2 cans of vegetable or chicken broth
plenty of vegetable oil, shortening or lard
6-6oz bags of corn shucks
2 T. chili powder
8 T. paprika
6 T. salt
2 T. garlic
2 C. water blended with jalapeno peppers, or just increase the broth
Fillings-prepare a day before and leave in fridge overnight.
LOTS of big cooking pans.

The day before: Prepare the filling. The traditional filling in Texas is shredded pork (you can even add in some raisins). You can also use seasoned pinto beans, New Mexico corn and zucchini, lentils (seasoned with chipolte peppers, onions and garlic), chilies and cheese (a common filling in Central Mexico), shredded chicken (for an interesting flair throw in some spinach, pine nuts and feta cheese), or refried beans… Just about anything goes.
Early the next day: Put the corn shucks in sink or tub filled with warm water. Weigh them down. Soak for a minimum of 2 hours. Save the shucks that are not big enough for tamales. They will be needed for steaming the tamales.
The Masa: Place the masa on the counter top or in a large mixing bowl. Mix the broth with oil to make approximately 8 cups (if you are using shortening or lard add them separately). Gradually add oils and broth to the masa. Sprinkle with the spices and add the jalapeno water. You want the masa to be a spreadable consistency. The main idea is to make it thin enough to spread, yet thick enough not to be sticky or unmanageable. You want to work air into the masa until it is smooth and fluffy. It is impossible to over mix.
Spreading: Assemble helpers around the table and continue the experience. Everyone should have a plate and a butter knife or a spoon. A friend’s mother had a special spreader, but I preferred to use a spoon Take a shuck and hold it in the palm of your hand with the small end up opening toward you. Take one heaping tablespoon full of masa… spread on lower 2/3 of the shuck. Concentrate most of the masa on the right 4 inches of the shuck. The thickness is determined somewhat by personal choice…Just don’t spread it so thin that you can see through the shuck.
Filling: Next spread the filling down the middle of the masa. Form an assembly line with some people spreading and others filling. The tamale is then rolled. The right side is folded over the filling and then the left (remember most of the masa should be in the right side…so you want it close to the filling.) Then fold the unfilled end over to the middle. A family I made tamales with rolls their tamales up like an enchilada. Both methods enclose the filling inside the masa so I guess how one does it is based on tradition and preference. Roll until you run out of masa. Use canned refried beans if you run out of fillings, or just make unfilled tamales to drop into soups and beans.

The Stacking and the Cooking: Spread some of the remaining corn shucks on the bottom of the pot or use a metal rack. Place a coffee mug open end down in the middle of the pot (this is unnecessary, but it makes it easier). Stand the tamales shoulder to shoulder (open end up) around the cup. After filling the pot with tamales, add 1 cup of water (you may need more or less depending on the size of the pot), cover the tamales with more shucks and put the lid on the pot. Steam for about an hour. You will need to add water throughout the cooking time. Don’t forget to check them often. The tamales will burn if you let the water evaporate completely, and after all that hard work there is nothing worse than burnt tamales. Tamales are ready to eat when the shuck peels away from the masa with ease. Cool for 10-15 minutes.
Eating Tamales: Tamales are best eaten straight out of the pot. Just make sure and peel the shuck off first. Tamales can also be frozen for future enjoyment. To reheat just steam or cook in a microwave.

Thursday, December 16, 2010

A couple of great cookie recipes and a gift idea...


Well my computer is still acting up... so I don't want to stay online too long... but here are a few of my favorite holiday cookie recipes and a gift idea for the holiday season.

Mole-Asses Cookies

This is a Christmas cookie recipe from the K. family. My sister-in-law Elisabeth insists that these cookies most contain genuine mole asses to make them taste the very best. If, however, mole asses are not available at your local grocery or Asian market then molasses can be substituted.

3/4 C. shortening
1 1/2 C. sugar
1/4 C. Brer Rabbit Molasses
1 egg
2 t. baking soda
2 C. sifted all-purpose flour
1/2 t. cloves
1/2 t. ginger
1 t. cinnamon
1/2 t. salt

Melt the shortening in a 3-4 qt. Saucepan over low heat. Remove from heat and allow to cool. Then add the sugar, molasses, and egg. Beat well. Sift together flour, soda, cloves, ginger, cinnamon, and salt. Add these to the first mixture. Mix well and chill thoroughly. Form into one-inch balls; roll in granulated sugar and place on a greased cookie sheet two inches apart. Bake in moderate oven (370 degrees) for 8-10 minutes. Makes 4 dozen

Chocolate filled bon-bons

My mother makes these every year for Christmas...this is one of my all time favorite cookies and I am a cookie monster. I hope you enjoy!

1/4 C. shortening
1/2 C. sugar
1/4 C brown sugar
1 egg
2 t. vanilla extract
1/2 t. almond extract (I like to use a little more)
1 3/4 C. flour
1/2 t. baking powder
1/2 t. salt
1/2 C. finely chopped or ground almonds
3-4 dozen chocolate kisses

Preheat oven to 350 (F). Mix shortening and sugar until fluffy. Add egg and extracts and beat well. Add the flour, baking powder, salt and nuts. Mix until well blended. Form dough into one-inch ball and press around a kiss, completely enclosing. Bake for 12 minutes. Cool on wire rack. Makes 3 1/2 to 4 dozen cookies.

Gift Idea--For Christmas gifts for my daughter's kindergarten class I was suppose to send an inexpensive trinket for each kid. I hate all the junk that piles up around the holiday... so instead of sending a bag of bouncy balls or plastic lizards I bought cookie cutters and printed up a Gingerbread man recipe. I used the recipe found here... You can follow the directions to make your own personalized recipe card. Then all you have to do is print it, cut it out, and glue it to card stock or colored construction paper. Then you just tie it to the cookie cutter with a piece of ribbon and you have a great gift for work or class mates.

Cheers,
Jenn

Tuesday, December 7, 2010

Seeing Blue!

Thanksgiving was wonderful. The only glitch was when we had a complete computer meltdown...Blue screens turned into black screens and it looked like we might have lost everything...but thankfully it looks like everything is going to be fine. As a result of the meltdown I haven't had a computer in over a week... and with all the updates and such that I'm going to have to do to get my computer fully functional... I'm just doing the bare minimal today. I don't want to tempt fate.

It has been interesting not having a computer... I can't say that it has been a totally negative experience. My house is cleaner than it has been in months and I've actually been doing some fun stuff to fill the time usually allotted to the computer. The only sad thing is that I had big plans for the month of December and I probably won't be able to do exactly what I planned... but I have an alternative in the works for some fun multicultural Christmas posts. I will be posting again regularly in a few days... Until then I hope everyone had a wonderful Thanksgiving.

Wednesday, November 24, 2010

Thanksgiving preparations...


Well tomorrow is Thanksgiving... All my major appliances are working and my house is clean (thanks to my husband's hard work). I have all the groceries that I'll need. The bird appears to be thawed. The guest list is complete and I have an idea of what everyone will be bringing (it is a family potluck). The only thing up in the air right now is the weather. There is a 40% chance of rain... and that would make things a bit difficult since we will be eating outside on a covered carport... but as long as it doesn't storm we should be in good shape.

I have been hosting Thanksgiving at my house since my oldest daughter was born. I've only missed one year in that time... My second daughter was born in October 2007 and I wasn't really ready for a big feast at my house so soon after having a baby. But otherwise I have been cooking a turkey and doing my best to make it all happen since 2005.

This year once again I will be cooking the turkey, mashing the potatoes, roasting root vegetables around the bird, and making a pie. The rest will be brought over by friends and family. The kids have been working on holiday decorations for a few weeks now... As I type these words my sweet potato pie is baking and producing a heavenly aroma. I have never made sweet potato pie... so hopefully it will turn out well. I am using Alton Brown's recipe and I feel a little nervous about the consistency of the filling... but I will be keeping my fingers crossed. I'm sure it will be better than the disastrous pecan pie from last year.

Tomorrow I will pull the bird out of the fridge, season it, and put butter under the skin. I will probably put it in the oven at about 9:30 or 10. I will prepare the roasted vegetables with rosemary from my garden... and I will also make the mashed potatoes. If all goes as planned I will have everything on the table at between 2 and 2:30. Wish me luck!
I hope everyone has a safe and wonderful Thanksgiving!

Cheers,
Jenn

Tuesday, November 23, 2010

Battle of the Dressings...


Every year my husband and I argue about it... Which reigns supreme....bread dressing... or cornbread dressing??? I grew up in the south... and as a result my family always made cornbread dressing. We never stuffed the bird with it... My mom made it in a corning ware dish on the side. You can see it there on the table... It is next to the my Nana's fruit salad (which just means fruit covered with Cool-Whip). Bread dressing is alright... but it just isn't Thanksgiving without my mom's cornbread dressing. In my heart it is as sacred as stealing olives from the relish tray and eating seconds (and sometimes thirds) of both dinner and dessert.

My husband's family makes bread stuffing. They make some on the side (vegetarian style for my sister-in-law)... but they also stuff the bird with some of it. It tastes good... and I've had it many times... but when push comes to shove I'm a cornbread gal all the way. I could probably dig up his family recipe for stuffing... but this is my story and so I'll stick to what I know. Here is my mom's recipe for dressing... along with my Nana's fruit salad recipe:

Mom’s Cornbread Dressing

On Thanksgiving my family serves cornbread dressing. Here is my mother’s recipe vegetarian style:

Bake about 3-6oz packages of cornbread according to instructions. Crumble cornbread into a casserole dish. Brown 1 ½ cups each of onions and celery. Add to the corn bread along with some green onions for color. Add 3t. poultry seasoning (this is a spice not a broth so it is vegetarian) and 1 ½ t. pepper. Add about 3 slices of wheat toast breadcrumbs. Moisten this mixture with 3-4 c. of vegetable broth and 3 eggs. Bake at "turkey temperature" until the top is golden, but it is still moist.

Nana’s Fruit Salad

When I was a kid my Nana used to let me help make fruit salad. We would usually start by opening a can of fruit cocktail. The we would add a few odds and ins such as mandarin oranges, apples, bananas and extra grapes (there were never enough grapes in fruit cocktail)...And finally we would take a few scoops of cool whip and stir it in.

1 can of fruit cocktail
1 can mandarin oranges
banana
grapes
apples
Cool Whip

Mix all ingredients. Chill.

Monday, November 22, 2010

Thanksgiving with the Whooping Cranes

Before my husband and I had kids we would sometimes go camping down at the Texas coast during the long Thanksgiving weekend. We would spend some time enjoying a bit of bird watching at the Aransas National Wildlife Refuge . The Whooping Cranes make Texas their home during the fall and winter...so it is a beautiful time to visit. We would usually split our time between Mustang Island and Corpus Christi and make Thanksgiving dinner over a campfire.

The first year we did this we were planning on making foil packed veggies along with some fish for dinner. Somehow we left half our groceries at the store and didn't relize it until we had already set up our campsite. We ended up with just the vegetables for dinner and since the potatoes were still at the store with our fish... it was a bit heavy on the carrots... I was a bit angry about our meager meal at first... but after I had a glass or two of warming port in my belly I was feeling alright.

Here is the recipe that we used that year for dinner

Foil Packed Veggies

I make this dish almost every time we camp or cook out. This recipe never comes out the same… but it always tasted great. Use whatever veggie or seasonings you have on hand the following is just a suggestion. If you have basil and oregano you can make the veggies Italian style…or throw in a little taco seasoning for Tex-Mex veggies. Use you imagination! If it happens to be thanksgiving and you forgot the groceries... just marinate the guests with a generous amount of port and hope for the best.

2 Potatoes
2 Carrots
1 red onion
2 zucchini
3-4 mushrooms
1 bell pepper
garlic-a mix of whole cloves and minced (to taste)
tomatoes
salt, pepper, and other spices to taste
beer or other liquid

Place two pieces of foil across each other in the shape of a cross. Cut all veggies according to your preference. Layer them according to cooking time. Start with the hardest to cook veggies (potatoes and carrots) and top it off with the quickest cooking (mushrooms and tomatoes). Pour a little beer to keep moist or for crisper (and more fattening) veggies use butter. Fold the foil over and place on a hot grill. Cook until the veggies are soft adding beer as necessary to keep them from sticking. If you are short on time you can boil the potatoes and carrots until they are almost cooked before adding them to the foil pack.

Another year Paul and I camped out on the beach on Thanksgiving weekend. We bought some fresh shrimp in Aransas Pass and drove down the beach to a spot near Corpus Christi. We set up camp and began prepping dinner. The shrimp we bought had the heads still attached and I began the messy job of peeling the shrimp and preparing the marinade. Paul was going to collect kindling and build the fire while I started preparing dinner… it seemed like a good idea to me… All that changed, however, when I popped the head off the first shrimp and greenish goo got all over me. I got a bit squeamish and I asked Paul to help me finish the job…OK I’m rewriting history a little…what actually happened was this: After I got green goo on my shirt I whined like a baby. Then after a minor tiff Paul begrudgingly helped me with the icky shrimp heads. After our petty quarrel we had a wonderful evening and had one of the best damn dinners ever…so here is the recipe.

1 ½ lbs. Shrimp peeled and decapitated
6 key limes
1 small onion, sliced
6-8 mushrooms, sliced
Butter or olive oil
Cherry tomatoes
Peppers (we found small sweet peppers at the store)
Tortillas
Green sauce (canned or homemade)
2 heads garlic
Aluminum foil and skewers for kabobs

Begin by marinating the shrimp in the juice from the key limes for several hours.
Mix mushrooms and onions with oil or butter and wrap in foil. If you are using bell peppers you’ll want to include them in the foil wrap…
Cut off the tip of the head of garlic and remove as much of the outer paper as you can before smearing it with butter and wrapping it in foil as well.
The garlic and onion foil packs can be placed on the fire at any time. Just place them directly in the coals keeping an eye on them so that they don’t burn. When the onions and garlic are almost done you’ll want the put the shrimp and remaining veggies on the skewers. The shrimp doesn’t take long to cook so you’ll also want to wrap tortillas in foil and begin warming them while the shrimp cooks. To serve place the foil packs and kabobs on top of an ice chest or other flat surface and chow down. To eat the garlic…take a clove and squeeze the “meat” out of the outer paper. Throw all the ingredients into a tortilla, top with green sauce and enjoy!!!!

Happy Thanksgiving,
Jenn

Friday, November 19, 2010

Giving Thanks in Mexico

I spent the Thanksgivings of 2001 and 2002 in Guanajuato, Mexico. At the time my husband and I were working as English teachers. My first Thanksgiving there might have almost gone unnoticed if I hadn't been invited to spend it with a gal from the US and her family. I don't really remember much about this particular celebration... but thanks to the wonders of the Internet my experiences from that day have been preserved untouched for the last 9 years... and here it is with along with the only surviving photo of that Thanksgiving:

Well Thanksgiving is not a holiday here...so I had to work yesterday. I had my students make those turkeys where you trace your hand...and we talked about the traditions and the foods of the holiday. There was a holiday here on Monday and Tuesday so I was able to go out of town for a few days. We stayed in Toluca and traveled around the state of Mexico. I had a wonderful time. I ate some exceptionally fresh trout in a town called Malinaco (the trout was caught in a spring fed pool inside the restaurant). Delicious... and only about $4 for a whole fish, potatoes and all the tortillas and salsa I could eat...Plus a beer. I also got to check out some really cool Aztec ruins.
The last day of our mini-vacation we went to an extinct volcano near Toluca and actually drove into the crater. The peak is at over 4,600 meters (about 14,000 feet)...There was a lot of snow...really really beautiful...and now I´ve had a snow ball fight in the tropics.

For Thanksgiving some of my friends made a traditional Thanksgiving dinner. Turkey, stuffing, mashed potatoes, a fruit and a vegetable salad, bread and I brought roasted potatoes and carrots... It was very good! The only things missing were the cranberry sauce (I don´t think that it exists here) and pumpkin pie(pumpkins exist here and are used for all kinds of sweets...but I have never seen a pumpkin pie). I give thanks this year for many things... good friends (in the flesh and online)... a wonderful family... and the ability to live out my dream of living here in Mexico.

Thanksgiving 2002 was a little more memorable. We were running out of money and we knew our Mexico experience was near an end. It was obvious to us that we were outsiders in Mexico... and yet at the same time I had never felt so much a part of anything in my entire life. There is so much more to this story and so much more to say about this chapter in my life... but this is supposed to be about Thanksgiving so I think I will leave that for another day.

We had a big celebration with many friends and even some family. My parents came for a visit and brought many of the trimmings for a traditional Thanksgiving meal... A turkey was impossible due to fact that the only oven I had was a small toaster oven. Instead we had rotisserie chicken that we purchased from a little restaurant down the hill. My roommate, Corina, made sweet potatoes (known as Camote in Mexico). She cooked it Mexican style by reducing cone shaped chunks of brown sugar into a sweet sauce. Another Mexican touch was the mole sauce for the Turkey (courtesy of Jonatan's family who made and sold it). Our more traditional dishes included Cornbread stuffing, fruit salad, mashed potatoes and gravy, cranberry sauce, and a relish tray.

The biggest hits of the meal were the things that you just couldn't get in Mexico: The cranberry sauce, of course... and the pumpkin bread that I was able to make with the canned pumpkin my mom brought from the states.

Overall it was huge success. Everyone was happy and we had fun sharing a traditional US holiday with our friends from Mexico. I don't really know what I was thankful for that year.... but looking back I know what I'm thankful for now. I'm thankful for the wonderful time I spent in Mexico. I'm thankful that my family was able to visit me there and enjoy the experience as well...but most of all I am thankful for where that journey has led me in my life.


Here is the recipe I used for the pumpkin bread that I made in Mexico. I didn't have any fresh or frozen cranberries... so I just made it without...

PUMPKIN CRANBERRY BREAD

1 cup canned solid-pack pumpkin
1 cup sugar
1/4 cup water
2 large eggs
1/4 cup vegetable oil
2 cups all-purpose flour
2 teaspoons baking powder
1/2 teaspoon salt
1/4 teaspoon baking soda
1/4 teaspoon ground cinnamon
1/4 teaspoon ground ginger
1/8 teaspoon ground cloves
1 cup picked-over fresh or frozen cranberries


Preheat oven to 350° F. and butter a loaf pan, 8 1/2 by 4 1/2 by 2 3/4 inches. In a large bowl with an electric mixer beat together pumpkin, sugar, water, eggs, and oil. Sift in flour, baking powder, salt, baking soda, and spices and stir just until batter is smooth. Stir in cranberries and spoon batter into loaf pan, spreading evenly.

Bake bread in middle of oven 1 hour and 15 minutes, or until a tester comes out clean, and cool in pan on a rack 10 minutes. Turn bread out onto rack and cool completely. Bread may be made 4 days ahead and chilled, covered.

Makes 1 loaf.

Happy Thanksgiving,

Jenn

Thursday, November 18, 2010

Thanksgiving Past

For the next week in preparation for Thanksgiving I'm going to be posting photos and recipes from Thanksgivings past. I'll write about some of my Thanksgiving memories and post the recipes that made these memories happen. I don't have many photos from Thanksgiving... in the years before digital images only a few of my photos have made it into my collection... and in more recent years, as both cook and photographer during the holidays, I find that the cooking wins and I don't have time for the camera.


This little photographic gem is from 'round about 1977... This is how I remember Thanksgiving as a child: A nicely set table, a BIG turkey, and those most dear to me (my mom, dad, brother and sometimes a grandparent or two) hanging out and eating together. I also remember thinking cranberry sauce was jelly and smearing it on rolls (something my papa found funny and thought merited a new family tradition), too many pies, tons of leftovers, and watching the Macy's Thanksgiving Day parade on TV.


Speaking of pies... here are a couple of recipes for pies that we usually included on our Thanksgiving buffet... along with the more traditional pumpkin and pecan pies of course...


Fudge Pie

This pie is a favorite around my families house on holidays and birthdays. It was given to my mother by a friend from our church and has become a part of all our holiday traditions.

1 stick of margarine
2 squares of unsweetened chocolate
two eggs
1 C. sugar
¼ C. flour
1 t. vanilla
uncooked pie shell
vanilla ice cream

Melt margarine and chocolate. Beat the eggs separately. Add the sugar and flour to the eggs. Mix in the melted chocolate and margarine. Add the vanilla. Bake in an uncooked pie shell at 350 degrees for 25 minutes. Serve after partially cooled with vanilla ice cream.

Lemon Pie

This is a wonderful and simple pie. My mother makes this one all the time.

1 can Eagle brand milk
3 egg yokes
1/2 C. lemon juice
graham cracker crust

Blend the first three ingredients and pour into the crust. Chill for several hours and then serve with whipped cream and garnish with lemon slices if you wish.

Tuesday, November 16, 2010

Diwali Festival


Over the weekend we went to a wonderful festival at the George Washington Carver Museum called Celebrate Me! India. It was held in honor of the recent Hindu holiday Diwali (also know as the festival of lights). Diwali is a 5 day festival that happens each year in October or November. It celebrates the return of Lord Rama after a 14 year exile. It is also the celebration of the lunar new year.
My older daughter and I started keeping a cultural scrapbook about a year ago. We would study a country and do crafts, cultural activities and make food from each country. Now that my younger daughter is old enough to enjoy it we have picked it up again. We had been studying India for a couple of weeks and it was the perfect ending to the unit. There were plenty of kid and adult friendly activities to do... and it really added color to something that we had only glimpsed online or in books.

There were musical groups on hand that played traditional instruments such as the sitar and harmonium. There was even a workshop on playing the Tabla Drums.


There were fun crafts available for the kids...and they had a friendly bunch of volunteers to help the kids out. They made bracelets, elephant masks, and they even had some fun coloring Diwali themed pictures.


They had traditional Indian garments available and there were woman there who would instruct you on the proper way to wrap a Sari.


If you wanted a chance to get moving...there was a yoga class for the kids... and a Bollywood shake class that was fun for all ages.


There was a "hands on" Henna demonstration... Kids and adults were encouraged to get inked... My daughters were so in love with this part of the experience that we were inspired to go out and get our own henna and try it out at home.


The elegant Anuradha Naimpally presented myths of India first in words and then in dance. I think that this was my favorite part of the festival. After her performance some of her dance students performed both traditional and modern dance styles.


And last... but certainly not least... you could try a few Indian dishes. They had lamb meatballs, spinach pakora, samosas, and chai on hand to sample. I love Indian food... but my daughters were not terribly fond of what they tried. We are going to make Tandoori chicken, rice and a lentil dish later in the week so they can try again. We are also planning on making a yogurt drink called a Lussi or Lassi today after school. I will post these recipes and photos when we do.... but until then I will leave you with a basic curry sauce recipe that is similar to the one that they cooked the lamb meatballs in for the festival.


Classic Curry Sauce


This sauce is great... you can use it for just about anything. I use it as a sauce for my koftas (these are made of veggies, chickpea flour and sometimes cheese...and are a bit like American dumplings) . It is also a good base to simmer veggies or meats.


5 Large cloves garlic
1 1-inch piece of ginger peeled
1 large onion cut into 6 wedges
1 large tomato - or one can of tomatoes
1/2 cup cilantro
3 T. oil
2 T. curry powder or all-purpose garam masala
2 tsp.cumin
1/2 tsp tumeric
salt to taste
1/2 cup yogurt
4 cups water
1/2 tsp. garam masala

In food processor with S-blade (or blender), process garlic, ginger and onions. Heat oil and cook mixture until brown. Process tomatoes and cilantro and add to the onion mixture. Increase heat and cook until liquid evaporates. Stir in spices and cook 2-3 min. more... add yogurt a little at a time to prevent curdling. Add water and bring to a boil. Boil for 5 min. At this point add chopped veggies for a vegetable curry... or cook 15-20 min. to make a sauce for the koftas.


Thursday, November 11, 2010

As American as Apple Pie...


Honor the veteran in your life by baking him or her an apple pie... What could be more American than that?

Apple Pie

This is a huge pie! Keep an eye on it in the oven it likes to bubble out of the shell and make a mess of the oven. I line the bottom of my oven with foil to keep it cleaner.

Pastry for two pie crusts
3 lbs. tart cooking apples
2 T. lemon juice
1 C. sour cream
1 C. granulated sugar
2 T. flour
1 t. ground cinnamon
1/8 t. nutmeg
1/4 t. salt
3 T. dark brown sugar
3 T. sugar
1 t. cinnamon
1 C. chopped walnuts
2 T. butter
milk
granulated sugar

Line pie plate with 1 recipe of crust dough (reserve the other crust recipe for top). Peel core and slice the apples. Sprinkle with lemon juice. Toss with sour cream. In a small bowl combine the sugar, flour, cinnamon, nutmeg and salt. Mix well. Add to the apples and toss lightly to combine. Make the topping by combining the sugars, cinnamon, and walnuts. Roll out the remaining crust into a 10-in circle...Cut into 9 1-inch strips. Preheat oven to 400 F. Turn the apple mixture into the pie plate. Dot the top with butter. Sprinkle the topping evenly over the apple mixture Moisten the rim of pastry slightly with cold water. Arrange 5 pastry strips 1/2 inch apart over filling and press ends to the rim. Place the remaining strips across the first ones and brush the top with milk and sprinkle with sugar. Bake 50 min until the crust is golden and juices bubble. After the first 30 minutes place a foil lid over it to prevent over-browning. Cool on wire rack and serve with ice cream.

Wednesday, November 10, 2010

BOW Ourdoor Cooking Class

As I promised here is a little more about my experiences this weekend with BOW (Becoming and Outdoors Woman). One of the many highlights of my weekend was my outdoor cooking class. I really enjoyed it and learned a lot about all the new equipment that is out there but I also learned tips on using some of the old fashioned technology like Dutch Ovens.Here is an assortment of cooking gear for the back packer: A pouch to carry utensils and spices, a small propane stove with an extra light cooking pot, and a fold up fire pit (it is the item that looks like a vegetable steamer).
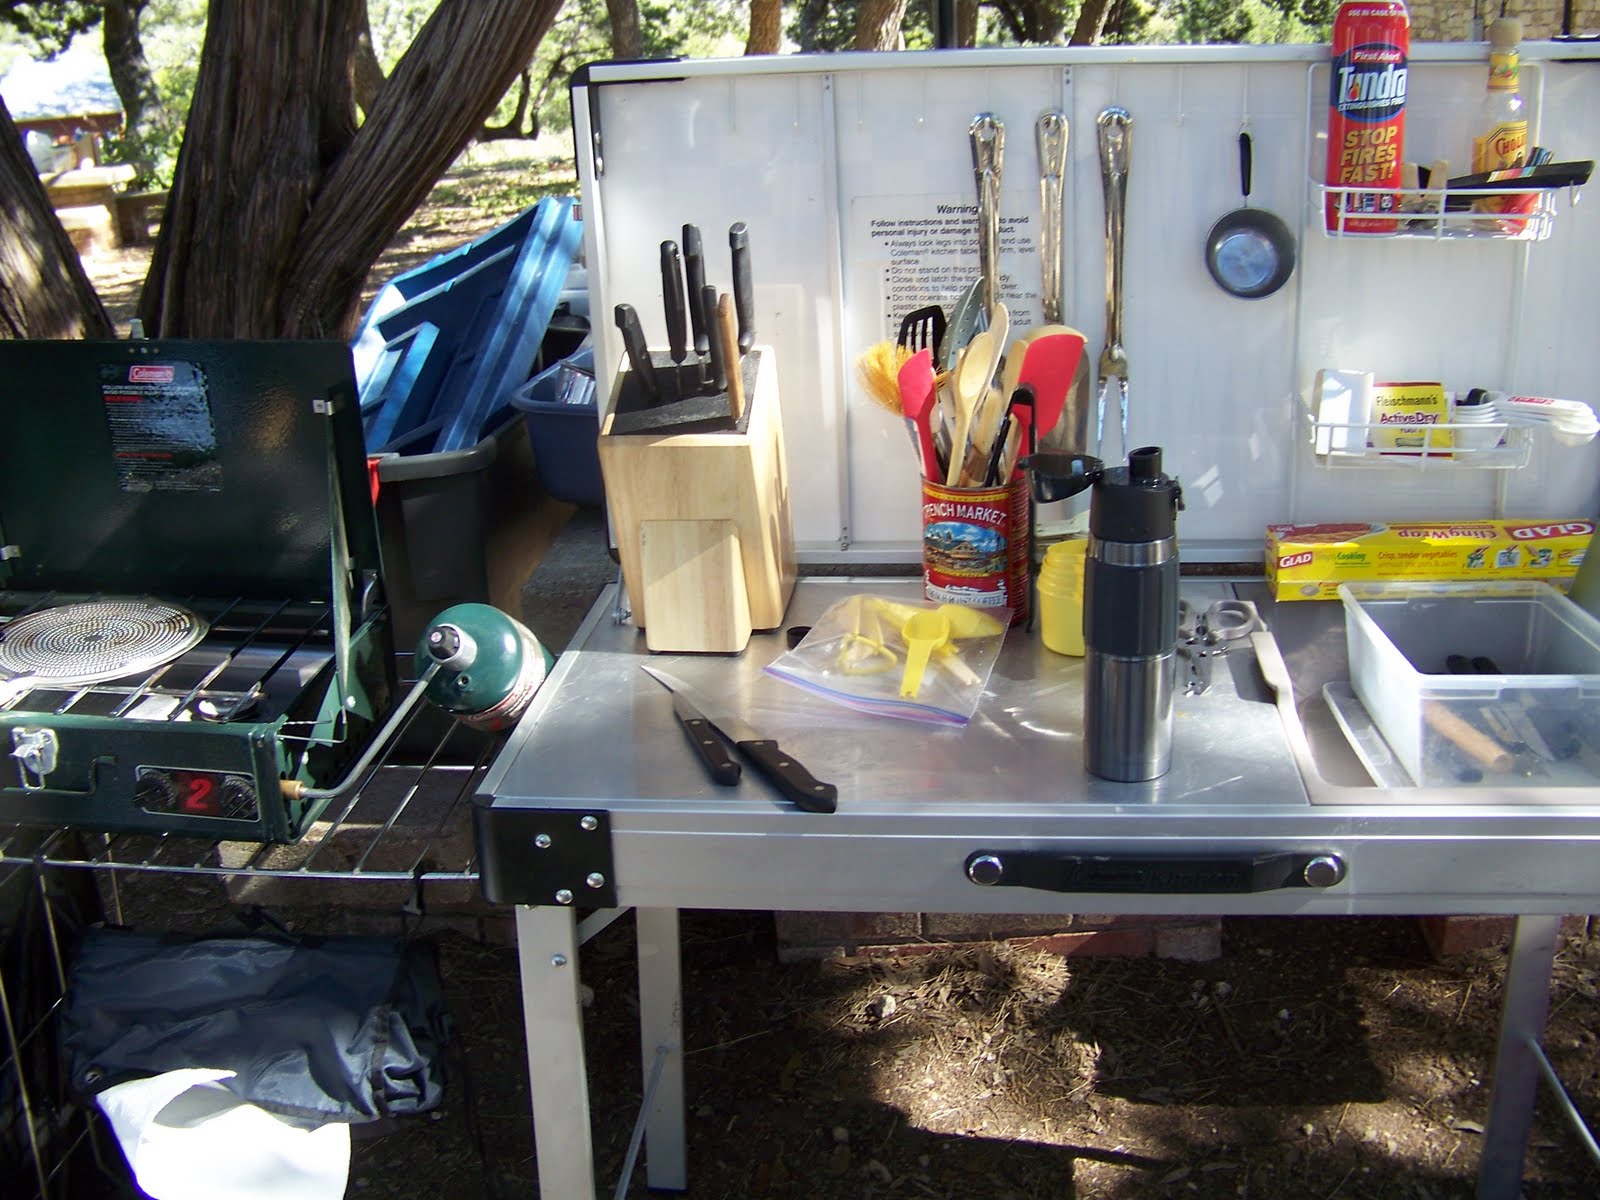


This on the other hand is a fully stocked outdoor kitchen for the luxury camper or tailgater. It even has a small sink for washing dishes and plenty of room to store all those gadgets that some of us don't like to live without.


Here our instructor is whipping up some cowboy coffee. He put the grounds inside a bandanna. Along with the grounds he placed an egg that he lightly cracked in order to keep the grounds from escaping into the boiling brew. He then dropped the coffee into a pot of boiling water and cooked it until it reached the desired strength. I plan on doing some experimentation and research about the egg method. I've read about it but this was the first time I'd seen it demonstrated and I must say my interest is peaked.


For our starter we made Salmon on a cedar plank. Our instructor seasoned it lightly and then topped it with lemon slices and a sprig of rosemary. The cedar plank must be soaked for several hours prior to cooking (preferably overnight). He then placed the plank on a propane grill and lowered the lid until the fish flaked easily.


Here is the finished product. We ate it on crackers for some truly gourmet camping fare.


Next we made tin turtles. To make these you simply wrap meats and veggies up in a small sheet of foil and place the packages directly on the coals. I've made these before... but this time I learned a new trick. Simply line the foil with cabbage leaves to prevent the veggies from burning. The cabbage leaves will burn (and frankly they smell pretty awful)... but once you get past that you'll enjoy nicely cooked vegetables and meat without the typical overcooked bottom layer.


We each labeled our tin packages with fingernail polish so that we could eat our own custom made creation. The fingernail polish will weather the fire better than most other methods.


Here is my finished creation. The burned mess on the bottom is the cabbage leaves... but once I poured my meal into a bowl it was cooked to perfection.


The next dish was Cornish hens cooked in a Dutch Oven. First he rubbed butter under the skin and seasoned them with rosemary, parsley and chives. Then he simply placed them in a Dutch oven with some baby carrots and broccoli. He placed the coal under the oven and then cover the lid with more coals and baked these babies for about 45 minutes-1 hour. Mmmmmm.


Here are the birds cooked to perfection. I was really impressed with how easy and yet elegant this dish was.


Before we even arrived our instructor whipped up a batch of sour dough biscuits and set them to rise. He keeps a batch of sourdough starter on hand for just such occasions and he showed us how to prepare the Dutch oven for cooking. He said that any sour dough biscuit recipe would do... I found this one on line... and I plan on trying this once I get around to buying myself a Dutch oven.


Here is the finished product. We ate these delicious treats with lots of butter and honey. They were fantastic!


Last, but not least, we made some peach cobbler. First we melted a whole stick of butter in an insert pan and added two large cans of peaches in heavy syrup and a tablespoon of cinnamon. I was responsible for adding the cinnamon... and oops... a slip of the wrist and half the jar went in... but no worries it was wonderful anyway. After the peaches came to a boil we sprinkled a box of yellow cake mix on the top (to make the crust ).


Once the ingredients were all added to the mix we simply arranged the coals around the Dutch Oven and waited.


And here is the finished product. I found a similar recipe online for anyone who is interested. You can find it here.

After this meal fit for a king class it was time to head to dinner. Yikes! I ate a big salad and then waddled back to my room.
Cheers,
Jenn

Monday, November 8, 2010

BOW Workshop

I just got back from a Becoming an Outdoors Woman workshop at Parrie Haynes Ranch. It was a wonderful experience and I certainly plan to attend future BOW events.
They put us up in clean and comfy cabins, they fed us well, and I met a lot of really nice people along the way. While there I attended four very informative sessions taught by experts in outdoor activities. There were even evening (and morning) astronomy presentations and a toasty camp fire each night. The BOW workshops offer hands on activities for women 18 and up... and it is not just a Texas thing... check the link above for your local organization.
My sessions were:

I took Kayaking and enjoyed a Friday afternoon of instruction and a short trip on the Lampasas River. We learned the basics and had a great time doing it. I've kayaked before... but now I have a lot more confidence in my abilities. The water was cold... but our instructor's were top notch... so I didn't get wet...but I was also prepared!

I wore this extremely fashionable and flattering (possibly even sexy) river wear to keep me dry and warm in case my boat accidentally capsized in the icy Lampasas river.

The next morning I started out with Archery basics. I took Archery in college... but I must say that I learned more in 3 hours than I did in a whole semester at the University. It was a great class and it made me want to go out and get my own Archery equipment.

I even managed to hit the target!

My second class on Saturday was outdoor cooking. I learned a lot about Dutch oven cookery... and I had a great time experiencing a little hands on time in a well stocked outdoor kitchen. I will, of course, share more about this class later in the week... and I will share my photos and recipes from the class as well.

Now I just need to get my own dutch oven so that I can start making my own wonderful campfire creations.

My last class on Sunday morning was fishing basics. It was a really relaxing way to spend a Sunday morning and I must say that I had a great time fishing... even if I didn't catch anything.

I hope everyone will check out their own local BOW organizations and get involved. It was a wonderful experience that I would recommend to every woman I know!

Cheers,
Jenn

Tamales and Karaoke