Showing posts with label grilling. Show all posts

Thursday, July 28, 2011

Thai Chicken Two Ways

In this summer heat I like to look for recipes that keep me out of the kitchen... and this is the perfect meal for that. If you double the Grilled Chicken recipe you can have a meal for 4 people two nights in a row and only have to cook one night.

Here is the Thai Chicken the first night. I served it with carrot salad and edamame. The salad requires no cooking... you cook the chicken outside... and I steamed the edamame in the microwave. This kept my kitchen nice and cool in the Texas heat.


Thai Garlic Chicken

4 cloves garlic
4 boneless chicken breasts
1 T. ginger root
1 lime (juice and zest)
3 T. oil
1 T. soy sauce
squirt or more of siracha sauce
2 T. cilantro

Place all (except chicken) in blender and puree until smooth. Pour over chicken and marinate for a couple of hours. Grill chicken.

Day 2: Thai Salad

The next night all I needed to do was warm up the left over chicken, whip up some dressing, boil some potatoes and eggs (they go into the salad), and then I made a nice green salad with all the ingredients my family likes. I like to top the whole thing with crunchy chow mein noodles for a little crunch.


Dressing for the salad

6T. peanut butter
1 C. boiling water
4 T. cider vinegar
1 T. sugar or honey
A little soy sauce a teaspoon or 2 (to season)
3-4 cloves garlic
crushed pepper, to taste
2 t lemon or lime juice

Whisk together peanut butter and water (mix it in slowly...you don't use all if the dressing gets too thin... there are more liquids to add). Add remaining. Taste for seasoning and adjust as you like.
Cheers,
Jenn

Tuesday, April 5, 2011

The Humble Hamburger

The secret to a good hamburger, in my opinion, is simplicity. When I make a turkey burger I like to spice things up a bit, but when I'm in the mood for beef I don't like to mess around too much. I like to add flavor with condiments and toppings rather than adding things to the beef directly. Some people swear by adding minced onions or bread crumbs to their beef. To each his or her own. For me the perfect burger is simple. . 1 lb ground beef (I like to use natural horomone free beef 85/15)

Salt and pepper

Buns

Whatever toppings you like (lettuce, tomatoes, pickles...this is where you can get creative use blue cheese or avocado... whatever you like)

Condiments (mustard, mayo, ketchup)


Shape meat into 3 adult size patties or 2 adult and 2 child size burgers. Sprinkle with salt and pepper (add a little worcestshire if you just can't let it be) and then grill the burgers. Serve with salad and sweet potato fries. For more about sweet potato fries just go here...


How do you like your hamburger? Leave a comment and tell me.

Thursday, March 17, 2011

Spring Break Camping


It is Spring Break here and my husband and daughter have the week off, and as a result I've been taking the week off as well. We went on a wonderful camp out for two nights and now we are back at home. Unfortunately I have come down with viris of some sort and have been in bed with a fever since our return.... but here are some quick pictures of our camp site grub and a few others as well. I will be back to posting regularly next week.


Foil packed potatoes, sausage, and black beans cooked right in the can... Typical camping fare. We served it with warm tortillas and lots of fresh fruit.


Chillin' in the hammock, a chilly dip in the spring, and a game of marbles.
A wonderful time was had by all.
Cheers,
Jenn


Monday, November 22, 2010

Thanksgiving with the Whooping Cranes

Before my husband and I had kids we would sometimes go camping down at the Texas coast during the long Thanksgiving weekend. We would spend some time enjoying a bit of bird watching at the Aransas National Wildlife Refuge . The Whooping Cranes make Texas their home during the fall and winter...so it is a beautiful time to visit. We would usually split our time between Mustang Island and Corpus Christi and make Thanksgiving dinner over a campfire.

The first year we did this we were planning on making foil packed veggies along with some fish for dinner. Somehow we left half our groceries at the store and didn't relize it until we had already set up our campsite. We ended up with just the vegetables for dinner and since the potatoes were still at the store with our fish... it was a bit heavy on the carrots... I was a bit angry about our meager meal at first... but after I had a glass or two of warming port in my belly I was feeling alright.

Here is the recipe that we used that year for dinner

Foil Packed Veggies

I make this dish almost every time we camp or cook out. This recipe never comes out the same… but it always tasted great. Use whatever veggie or seasonings you have on hand the following is just a suggestion. If you have basil and oregano you can make the veggies Italian style…or throw in a little taco seasoning for Tex-Mex veggies. Use you imagination! If it happens to be thanksgiving and you forgot the groceries... just marinate the guests with a generous amount of port and hope for the best.

2 Potatoes
2 Carrots
1 red onion
2 zucchini
3-4 mushrooms
1 bell pepper
garlic-a mix of whole cloves and minced (to taste)
tomatoes
salt, pepper, and other spices to taste
beer or other liquid

Place two pieces of foil across each other in the shape of a cross. Cut all veggies according to your preference. Layer them according to cooking time. Start with the hardest to cook veggies (potatoes and carrots) and top it off with the quickest cooking (mushrooms and tomatoes). Pour a little beer to keep moist or for crisper (and more fattening) veggies use butter. Fold the foil over and place on a hot grill. Cook until the veggies are soft adding beer as necessary to keep them from sticking. If you are short on time you can boil the potatoes and carrots until they are almost cooked before adding them to the foil pack.

Another year Paul and I camped out on the beach on Thanksgiving weekend. We bought some fresh shrimp in Aransas Pass and drove down the beach to a spot near Corpus Christi. We set up camp and began prepping dinner. The shrimp we bought had the heads still attached and I began the messy job of peeling the shrimp and preparing the marinade. Paul was going to collect kindling and build the fire while I started preparing dinner… it seemed like a good idea to me… All that changed, however, when I popped the head off the first shrimp and greenish goo got all over me. I got a bit squeamish and I asked Paul to help me finish the job…OK I’m rewriting history a little…what actually happened was this: After I got green goo on my shirt I whined like a baby. Then after a minor tiff Paul begrudgingly helped me with the icky shrimp heads. After our petty quarrel we had a wonderful evening and had one of the best damn dinners ever…so here is the recipe.

1 ½ lbs. Shrimp peeled and decapitated
6 key limes
1 small onion, sliced
6-8 mushrooms, sliced
Butter or olive oil
Cherry tomatoes
Peppers (we found small sweet peppers at the store)
Tortillas
Green sauce (canned or homemade)
2 heads garlic
Aluminum foil and skewers for kabobs

Begin by marinating the shrimp in the juice from the key limes for several hours.
Mix mushrooms and onions with oil or butter and wrap in foil. If you are using bell peppers you’ll want to include them in the foil wrap…
Cut off the tip of the head of garlic and remove as much of the outer paper as you can before smearing it with butter and wrapping it in foil as well.
The garlic and onion foil packs can be placed on the fire at any time. Just place them directly in the coals keeping an eye on them so that they don’t burn. When the onions and garlic are almost done you’ll want the put the shrimp and remaining veggies on the skewers. The shrimp doesn’t take long to cook so you’ll also want to wrap tortillas in foil and begin warming them while the shrimp cooks. To serve place the foil packs and kabobs on top of an ice chest or other flat surface and chow down. To eat the garlic…take a clove and squeeze the “meat” out of the outer paper. Throw all the ingredients into a tortilla, top with green sauce and enjoy!!!!

Happy Thanksgiving,
Jenn

Wednesday, November 10, 2010

BOW Ourdoor Cooking Class

As I promised here is a little more about my experiences this weekend with BOW (Becoming and Outdoors Woman). One of the many highlights of my weekend was my outdoor cooking class. I really enjoyed it and learned a lot about all the new equipment that is out there but I also learned tips on using some of the old fashioned technology like Dutch Ovens.Here is an assortment of cooking gear for the back packer: A pouch to carry utensils and spices, a small propane stove with an extra light cooking pot, and a fold up fire pit (it is the item that looks like a vegetable steamer).
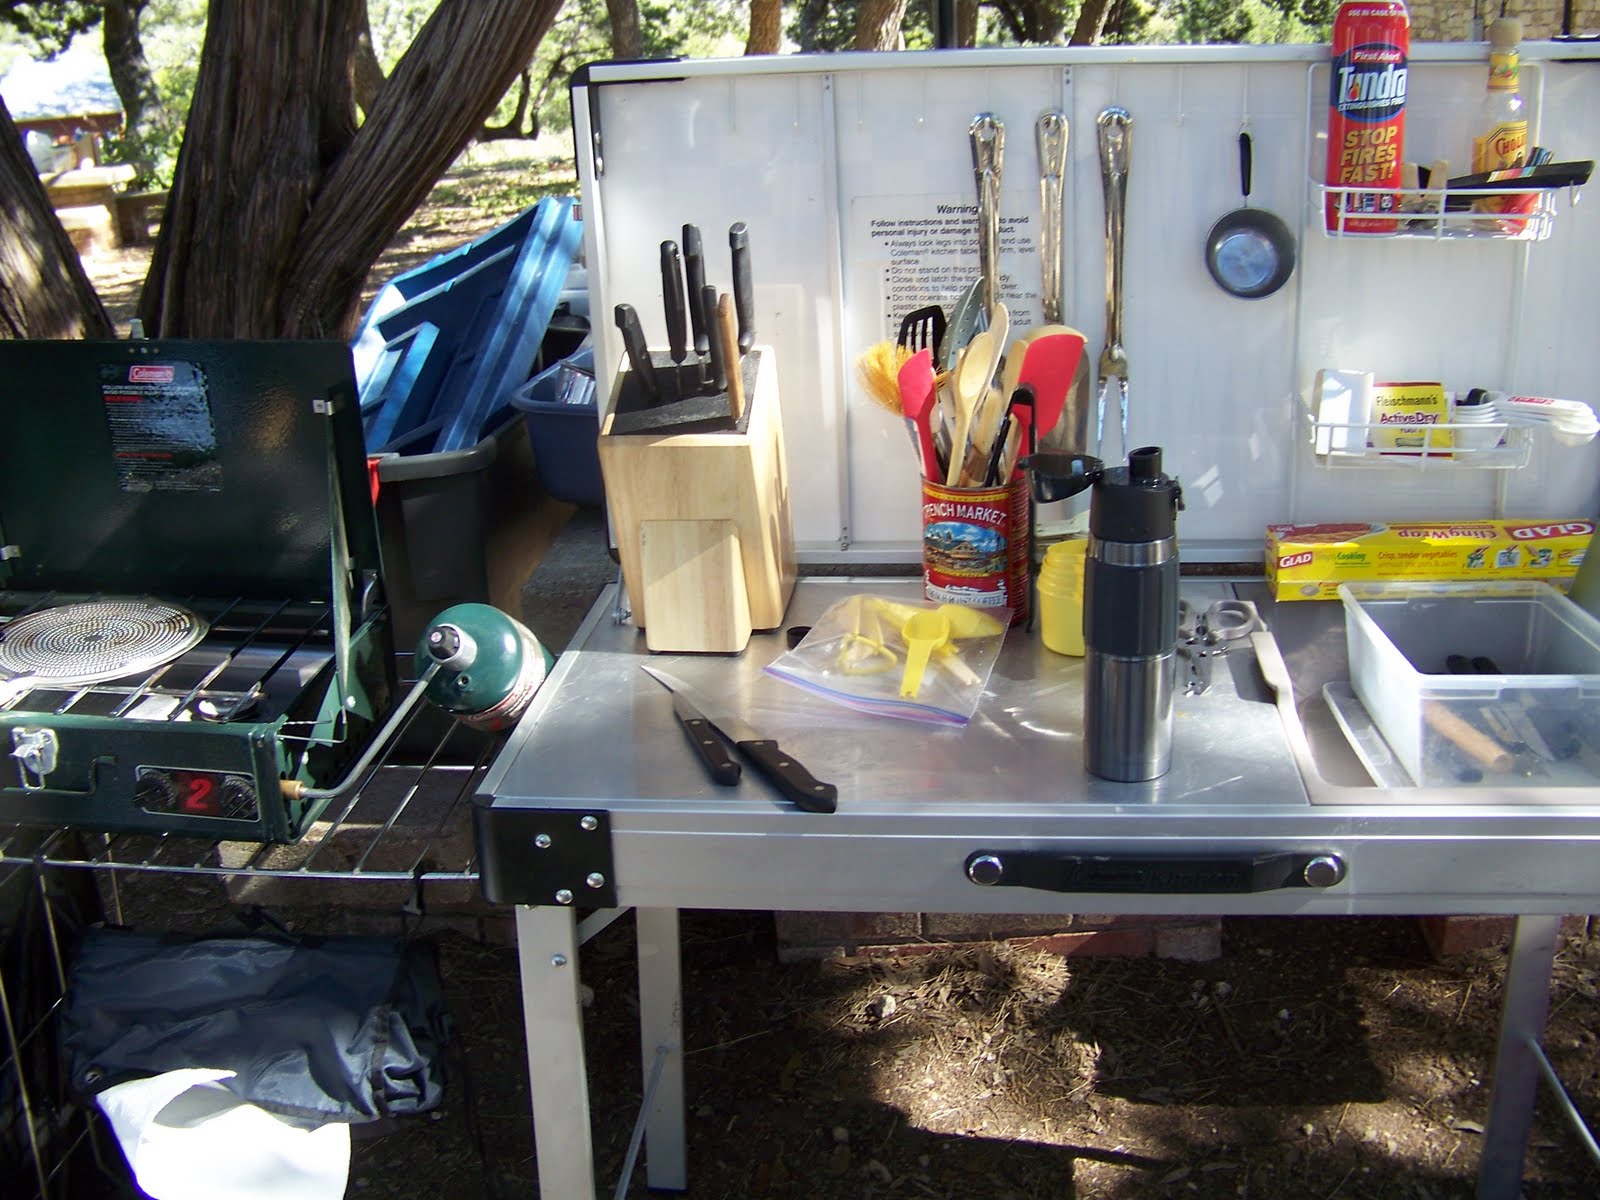


This on the other hand is a fully stocked outdoor kitchen for the luxury camper or tailgater. It even has a small sink for washing dishes and plenty of room to store all those gadgets that some of us don't like to live without.


Here our instructor is whipping up some cowboy coffee. He put the grounds inside a bandanna. Along with the grounds he placed an egg that he lightly cracked in order to keep the grounds from escaping into the boiling brew. He then dropped the coffee into a pot of boiling water and cooked it until it reached the desired strength. I plan on doing some experimentation and research about the egg method. I've read about it but this was the first time I'd seen it demonstrated and I must say my interest is peaked.


For our starter we made Salmon on a cedar plank. Our instructor seasoned it lightly and then topped it with lemon slices and a sprig of rosemary. The cedar plank must be soaked for several hours prior to cooking (preferably overnight). He then placed the plank on a propane grill and lowered the lid until the fish flaked easily.


Here is the finished product. We ate it on crackers for some truly gourmet camping fare.


Next we made tin turtles. To make these you simply wrap meats and veggies up in a small sheet of foil and place the packages directly on the coals. I've made these before... but this time I learned a new trick. Simply line the foil with cabbage leaves to prevent the veggies from burning. The cabbage leaves will burn (and frankly they smell pretty awful)... but once you get past that you'll enjoy nicely cooked vegetables and meat without the typical overcooked bottom layer.


We each labeled our tin packages with fingernail polish so that we could eat our own custom made creation. The fingernail polish will weather the fire better than most other methods.


Here is my finished creation. The burned mess on the bottom is the cabbage leaves... but once I poured my meal into a bowl it was cooked to perfection.


The next dish was Cornish hens cooked in a Dutch Oven. First he rubbed butter under the skin and seasoned them with rosemary, parsley and chives. Then he simply placed them in a Dutch oven with some baby carrots and broccoli. He placed the coal under the oven and then cover the lid with more coals and baked these babies for about 45 minutes-1 hour. Mmmmmm.


Here are the birds cooked to perfection. I was really impressed with how easy and yet elegant this dish was.


Before we even arrived our instructor whipped up a batch of sour dough biscuits and set them to rise. He keeps a batch of sourdough starter on hand for just such occasions and he showed us how to prepare the Dutch oven for cooking. He said that any sour dough biscuit recipe would do... I found this one on line... and I plan on trying this once I get around to buying myself a Dutch oven.


Here is the finished product. We ate these delicious treats with lots of butter and honey. They were fantastic!


Last, but not least, we made some peach cobbler. First we melted a whole stick of butter in an insert pan and added two large cans of peaches in heavy syrup and a tablespoon of cinnamon. I was responsible for adding the cinnamon... and oops... a slip of the wrist and half the jar went in... but no worries it was wonderful anyway. After the peaches came to a boil we sprinkled a box of yellow cake mix on the top (to make the crust ).


Once the ingredients were all added to the mix we simply arranged the coals around the Dutch Oven and waited.


And here is the finished product. I found a similar recipe online for anyone who is interested. You can find it here.

After this meal fit for a king class it was time to head to dinner. Yikes! I ate a big salad and then waddled back to my room.
Cheers,
Jenn

Monday, August 23, 2010

Hatch Chilies

The New Mexico, or the hatch chili, is an aromatic pepper that is milder than the jalapeno. Like the jalapeno, however, it is a versatile chili that compliments many dishes. It can be served a variety of ways, but it is best when roasted and peeled. The green chili is central to New Mexican cooking. Right now it is Hatch chili season and they are being celebrated all over the Southwest. They are really inexpensive right now... so I like to buy a lot, roast them, and freeze whatever I don't use. The trouble is I think of so many ways to use them that I rarely have any left in reserve once the season is done.


How to Roast a Pepper: Place the oven on broil…or even better heat up the outside grill. Puncture each chili to prevent explosion. Place peppers on a cookie sheet or if cooking outside place directly on the grill. Cook until the skins begin to blacken and separate. Turn occasionally.


Remove from heat and place in a bag or a bowl with a lid to sweat. After 15 minutes or so peel and discard skin. If you wish to freeze some for future use leave skin on until you are ready to use.


New Mexico Green Sauce

If Hatch chilies don't happen to be in season right now... or you just don't live somewhere where they are common you can substitute other mild peppers like Poblano peppers for the hatch chilies. This is a good sauce for eggs, enchiladas, and burritos or just as a dip for chips.

6 New Mexico or Hatch chilies
1 C. warm water
2 T cooking oil
3 T flour
2 cloves garlic, minced
2 Cups veggie broth
1/2 small onion diced

After you roast the chilies in the broiler or on the grill and place them in a bag to sweat you will then want to remove the peel and seeds. Place 3 chilies in the blender with water and blend.


Sauté the flour in oil until slightly brown. This is the roux that will thicken up the sauce when you add the remaining ingredients.


Add garlic and onions and sauté until translucent. You can also heat up the broth at this time. You can use either vegetable broth or chick broth depending on whether you wish to make this a vegetarian meal.


Add other ingredients and cook until thick. Dice the three remaining chilies and add to mix. Serve hot or cold. Or use to top a New Mexico Style Burrito.


New Mexico Corn and Zucchini

2 t. veggie oil
3 New Mexico chilies-Roasted, peeled, etc…
1 Chopped onion
2-3 ears of corn
3-4 Cloves of garlic, minced
2 zucchini, sliced

Heat oil and sauté onions and garlic until translucent. Add the chilies, corn and zucchini. Cook until zucchini is tender, but not falling apart. Add salt and pepper to taste. Use as a side dish or a filling for tamales and burritos.

New Mexico Style Burritos
This is a recipe my husband Paul likes to make. The recipe is based on a burrito I ate at a small brewpub in New Mexico. The pub called the burrito “The Fatty”… and it is fat indeed!

1 recipe sauce
Burrito size tortillas
1 can black beans
1 recipe New Mexico corn and zucchini
Potatoes fried with onions, garlic and cumin. (cooked well-almost like mashed)

Wrap beans, potatoes, and veggie in tortilla and top with sauce. Garnish with cilantro and top with cheese if you wish. I also like to just put beans and potatoes in the burrito and serve the corn and zucchini as a side dish. You can stuff the burrito with whatever you wish... just make sure to top it with plenty of sauce!

Monday, May 3, 2010

Tapas


Tapas are little dishes. In Spain tapas are served before lunch and dinner in bars and taverns. They are also late night fare for bar goers. One legend about the origin of Tapas is this: In Spanish tapar means "to cover" and the first tapa was a slice of ham served on top of a glass to keep out the flies...because the saltiness of the ham increased sales the tradition followed. Another tale says that the Spanish king Alfonso the 10th was ill. His doctors prescribed that he have small bites of food with some wine between meals. The king then ordered that all the local inns couldn't sell wine without small dishes of food. Whatever the reason Tapas are wonderful.

For a simple tapas presentation I like to get cucumbers, tomatoes, and red bell peppers. Chop them up and put them on a platter. Serve with lemon wedges and drizzle with olive oil. Serve a variety of cheeses and meats with crackers and bread rounds are also a tasty addition. Maybe even some smoked salmon. Fresh fruits, small salads, and olives are also nice. If you want to make heartier fare then add some fried fish, steamed shell fish, shrimp cocktail or seasoned veggies like potatoes or mushrooms. Another common addition is the tortilla espanola. Presentation is important. Put everything on nice serving platters and garnish appropriately. Enjoy!

This past weekend we threw a party to celebrate our 15th wedding anniversary. For the party we had a selection of tapas and some cold beer (brewed by one of the guests), and some wine. Here is a list of the tapas we made for the party:

Stuffed Mushrooms (cooked on the grill)

Hummus with Bread Rounds

Peel and Eat Shrimp with Cocktail Sauce (I boiled the shrimp for a few minutes, chilled them and then mixed up some ketchup, horseradish, Worcestershire and lemon)

Spanish Spinach and Tomato Pizza
I sautéed 2 cloves of garlic and 1 onion in olive oil. I added a can of chopped tomatoes and cooked until the liquid was absorbed. I then add about 3 C. fresh spinach (I just added it by the handful until it looked right) and cooked until spinach wilted a bit. Then I spread it on a prepared pizza crust (you can use a "from scratch" crust... or for simplicity one of the Bobali types... the recipe I based this on made a pizza crust and cut it into small rounds for finger food size portions) and sprinkled it with pine nuts. I baked it for 10-15 minutes in a 400 degree oven.


Garlic Tomatoes
I cut several tomatoes in half and surrounded them with garlic cloves and topped with fresh thyme and salt and pepper. We then cooked them on the grill using indirect heat (at about 400 degrees) for about 40-45 minutes. To eat simply squeeze garlic on a tomato half and eat!

Berries and Melon


We also had some wonderful olives, shrimp stuffed cherry tomatoes, and other contributions by guests.

Monday, March 1, 2010

Paella


Last night we had friends over for dinner and made Paella. I prepped the ingredients and Paul put it all together on the grill. This was the first time that we cooked it on the grill and it was fantastic. They had shrimp scallops and crab legs available at grocery store... and how could you possibly go wrong with that? The first time I made Paella it was a friend’s birthday and for a birthday meal she requested Spanish cuisine. What she really wanted was Paella. When I began doing my research I had no idea that it would become one of my biggest culinary obsessions.
My first batch of Paella was cooked in an ordinary non-stick skillet. After that first bite, however, I knew that I would invest in my own Paella pan. In addition to the new cookware Paella introduced me to the pungent fragrance and vibrant red strands of saffron, numerous varieties of olive oil; and the joy of steamed mussels.


In Spain, men most often cook Paella, much like B-B-Q in the U.S. Another similarity to B-B-Q is that it is cooked on an outdoor fire. After the Paella is finished the family gathers around and consumes it straight out of the pan. They savor the crispy outer edges first making their way to the center squeezing lemon on it as they go. The pan is then merely wiped clean and stored for future celebrations.


Strict purist make a distinction between true paella and other rice dishes cooked in a paella pan. According to The Heritage of Spanish Cooking the original dish is called paella Valencia and can only be made on a wood fire using the traditional ingredients. The traditional ingredients are; rice, rabbit (or pork), chicken, snails, green beans, lima beans, tomatoes, olive oil, saffron, water and salt. But whether I say paella and you say paella-esque, my favorite way to make Paella is with seafood. Other variations that I’ve tried are excellent as well. After fishing in Winchester, Texas at a friends cabin I made a version that used green beans and several Blue Gil caught in Ross Lake. A delicious and time saving option is to buy a rotisserie chicken. It’s especially tasty when you can find a rotisserie that uses a wood fire. Then you get the outdoor flavor even when you cook it on your kitchen stove. Substituting chickpeas for the seafood creates a vegetarian version. Whatever you decide to include is fine. Just use you imagination. Paella is most likely named after the pan that it is cooked in, but the following legend is far more beautiful and my preferred choice for explaining the origin of this truly exquisite dish!

Here is the story: A Spanish princess traveling through southern Spain stopped at a small inn. The owner ,a young man struck by the princess’ beauty, decided to personally prepare the evenings feast for the princess as a gesture of his affection. Into a casserole dish he put his finest seafood meats and rice. He seasoned it with wine, olive oil, onions, garlic, and added the freshest tomatoes, peas, and asparagus from his garden. The princess was so delighted with the aroma and delicate flavor of the dish that after her meal she asked for the name. Since the young man had prepared the dish especially for her he decided to call it por ella (translation --"for her" ) or paella. (paraphrased from the book: Clarita's Cocina by Clarita Garcia)

Paella

Here is a basic recipe. They didn't have mussels last night so we used crab legs. These were precooked so we added them at the end of the cooking time in order to warm them.

Serve with lemon wedges

1/2-lb. shrimp, peeled (reserve the shells for broth)
a pinch of saffron threads
salt to taste or vegetable bouillon
1/4 C. olive oil
1/2-lb scallops
1/2 onion, chopped finely
6 garlic cloves, minced
1 tomato, halved and grated
1 1/2 C. Paella or medium grain rice
1 red bell pepper sliced
8 or more mussels
1 lemon, cut in wedges for garnish

In a medium saucepan, boil 4-6 cups of salted water. Add the shrimp shells and vegetable odds and ends and simmer, covered, for about 10 minutes. Strain the broth, and return it to the saucepan. Toast the saffron gently, crush the threads with the back of a spoon, and add to the shrimp shell broth. Taste for salt; the broth should be well-seasoned. In a 14-inch paella pan or a large frying pan, heat the oil on high. When the oil is hot, sauté the shrimp and scallops until almost cooked through. Set aside. Reduce the heat to medium and sauté the onion and garlic until the onion softens, about 5 min. Add the tomato and season with salt, sauté until the mixture, called the sofrito, has darkened and is a thick purée. When the tomato-onion sofrito is ready, add rice to the pan. Sauté until the rice loses its opaqueness. Increase the heat to medium-high. Pour in 3 cups of the simmering broth (reserving the remaining ) and stir or shake the pan to evenly distribute the rice in the pan. Bring the liquid to a boil. From this point on, do not stir the rice. Add the bell pepper. Cook the paella on medium-high, rotating and moving the pan to distribute the heat. If possible you might want to distribute the pan on two burners to keep the heat more even. Add mussels by submerging them in the broth to cook on top of the rice. When the rice begins to appear above the liquid, after 8 to 10 min., reduce the heat to medium low. Continue to simmer, rotating the pan as necessary, until the liquid has been absorbed, about 10 min. more. Taste a grain of rice just below the top layer; it should be al dente. (If the rice is not done add more broth to the pan and cook a few minutes more. Arrange the shrimp and scallops in the pan. Cover with aluminum foil and cook gently for another 2 min. to help ensure that the top layer of rice is evenly cooked. With the foil still in place, increase the heat to medium-high and, rotating the pan, cook for about 2 min., until the bottom layer of rice starts to caramelize, creating the socarrat. The rice may crackle somewhat, but if it starts to burn, remove the pan from the heat immediately. Let the paella rest off the heat for 5 min.

Sofrito (which means "lightly Fried") is a basic preparation widely used in Spanish cooking. Every sofrito is made with garlic, onions or both, many also include tomatoes, red or green bell peppers, parsley and meats: some are thickened with ground almonds, sieved hard-cooked egg yolks or even bread crumbs. Whatever the ingredients, they are generally chopped and usually cooked in olive oil.
From Time-Life Books: The Cooking of Spain and Portugal


FIN

Thursday, February 4, 2010

Stuff your favorite fun guy with stuffed fungi on National Stuffed Mushroom Day!


A mushroom goes into a bar and sits down to order a drink. The bartender walks over and says, ''I'm sorry sir, but we don't serve your kind here.''
The mushroom sits back and asks ,''Why not? I'm a fun guy!

The ancient Egyptians called the mighty mushroom the plant of immortality. Technically speaking the mushroom is not a plant, however. It belongs to the fungus kingdom... and as for the immortality part-- well some mushrooms can make you feel a touch immortal (or so I've heard tell) but you got to look out because many of them can be fatal. It is rumored that the Buddha, Siddhartha, died of mushroom poisoning and some say that the Roman Emporer Claudius was murdered when fed death cap mushrooms. So if you aren't an experienced mycologist I would suggest sticking to the supermarket on your next mushrooming expedition.

Today is National Stuffed Mushroom Day (February 4th)and in honor of this festive occasion here is my favorite stuffed mushroom recipe.

Stuffed Mushrooms

12 large white mushrooms
1 t. olive oil
¼ c. minced onion
4 cloves garlic
¼ c. bread crumbs
1 T. parmesan cheese
Fresh herbs such as basil, thyme and oregano
Salt and pepper, to taste
¼ C. water

Remove stems from mushrooms and chop finely. Pre heat outdoor grill or oven to 375. If cooking outdoors place mushroom caps on lightly oiled grill pan or if baking use a baking sheet. In a small non stick skillet sauté stems, onions, and garlic until onions are tender. Remove from heat and add remaining ingredients. Mix well. Fill caps and bake or cook (using indirect grilling-cook next to not directly over the heat source) on prepared grill. Cook for 15 - 30 minutes.

Tamales and Karaoke