Saturday, May 30, 2020

National Burger Day

It was National Burger Day on Thursday... and we missed it. For some reason when we were doing meal planning we thought it was on Friday and so we celebrated it a day late. But boy did we celebrate it! We used locally sourced beef, my daughter and I made pickles, and I made slaw and homemade hamburger buns. It was a friends birthday and so we enjoyed this feast and had a socially distancing picnic in our back yard and then enjoyed a drive-in movie.

My first project was making the pickles. I looked at several recipes for overnight refrigerator pickles and came up up with my own version.

Ingredients

1 bunch of fresh dill sprigs/ or a generous sprinkle of dry dill
4 garlic cloves minced
2 tablespoon crushed red pepper flakes (I just used a couple of packets of red pepper flakes that I got with my last pizza delivery.)
1 small chopped onion
3 cucumbers, sliced (I just used the standard cucumbers rather than buying cucumbers that were specifically for pickling.)
3 cups water
1 1/2 cup white vinegar
2 tablespoon sugar
2 tablespoons salt
black pepper, to taste
Sliced jalapeño peppers and sweet peppers and any other fresh herbs you think would complement the pickles (I had some fresh basil on hand)

Instructions

Place dill, garlic, red pepper flakes, fresh peppers, fresh herbs and onion in a large mason jar and then fill the jar to top with cucumbers.
Meanwhile, place the water, vinegar, sugar, salt, and pepper in a saucepan over high heat. Whisk until the mixture comes to a boil. Pour hot liquid over cucumbers. Cool slightly, then refrigerate overnight.

As for the buns I used the 40-minute Hamburger bun recipe. The texture wasn't as light and airy as I normally like in a hamburger bun... but they were super fast and much better than your average store bought buns.

For the slaw I used a ramen coleslaw recipe from allrecipes.com. It was pretty good. I didn't have almonds so I used walnuts. I also substituted white onion for the green onion and added red bell pepper for a little color and crunch.

After this fabulous meal we enjoyed a drive-in movie. The perfect ending to a wonderful day.


Friday, May 29, 2020

A Baked Dozen... Baked Scotch Eggs


I made Scotch eggs last night. I've only had Scotch eggs on a few occasions, but they have always been fabulous. The first time I had one my sister in law made them, the second was at the Renaissance Festival... and then I had one at a street stall in London... So not only were they good they also had wonderful memories to go along with them. So when I decided to make them at home they had some pretty big shoes to fill.

There are many theories about the origin of the Scotch egg . In 1809 there was a recipe published that is similar to this dish, but in this recipe you smother your egg in gravy. Other sources suggest that it was inspired by an Indian dish called Kofta. One source says that in the original dish the egg was smeared in fish paste rather than covered in sausage...and still another possibility is that it was invented by a London based department store and sold as travelers food as early as 1738. Whatever the origin these eggs are packed with flavor and a lot of fun to make.

Normally these eggs are served as street or as a bar food and they are fried. While this recipe is by no means low fat or healthy it is baked instead of fried so it's a little lighter than the original dish. We made these for dinner last night and served them with a salad. I doubled this recipe so we would each have one for breakfast as well.


Scotch Eggs


4 eggs
1 lb sausage
1/2 tsp nutmeg
1 tsp mustard
1/4 cup each parsley and chives
Salt and pepper to taste
2 eggs, beaten (I did not need to double this when I doubled the recipe
flour
bread crumbs


Directions
Put the eggs into a medium pan, cover with cold water and bring to the boil. Boil for 4 minutes, then transfer to a bowl of ice cold water. Peel them when cooled.

In a medium bowl combine sausage meat with nutmeg, mustard, parsley, chives, salt and pepper. Divide the mixture into four parts.
Take one piece of sausage mixture, form a ball and flatten into a patty. Roll the egg in flour and shape the sausage patty around each egg.
Pre-heat oven to 400F 
Roll each meat wrapped egg into flour, then dip into beaten eggs and coat with crumbs.

Place on a baking sheet and bake for 35 minutes until the sausage is completely cooked.
Rest for 5 minutes before serving.


Monday, May 25, 2020

Arroz Con Pollo

I made Arroz Con Pollo the other night and it was terrific. I found a great recipe for Mama's Puerto Rican Arroz con Pollo. I made a few changes to the recipe since I didn't have all the right ingredients.... I think the best part of this recipe is how wonderfully seasoned the chicken comes out. For extra simplicity you can just buy adobo seasoning at the store so that you don't need to make your own. 


You can also play around a little with the sofrito. Sofritos are essential in Latin America, Italian, Spanish and Portuguese cooking. A Sofrito contains onion, garlic, pepper and tomato sautéed in olive oil. In this recipe I didn't have tomato sauce so I simply pureed some Ro-Tel tomatoes instead.


Arroz con Pollo has many variations. Spanish style has a more moderately seasoned chicken and uses saffron to season and color the rice. It has a more delicate taste and reminds me more of Paella. In Puerto Rico they use annatto oil to color this dish. I've never seen annatto oil... so I just used turmeric. This is the first time I've made the Puerto Rican version of this dish and I must say that it felt more hearty and spicy than the Spanish version and will definitely be a family favorite. There is some question about which culture made this dish first...but the truth is that most cultures have some form of chicken and rice...and this recipe is a keeper!


Wednesday, May 20, 2020

What's the Difference Between a Spring Roll and a Summer Roll?

SEASONING!

Actually that is not the difference at all... but I can't resist a corny pun.

Summer Rolls, or Gỏi cuốn  in Vietnamese, are the perfect combination of fun and flavor. They are light and full of healthy ingredients. They are the perfect meal for a hot day. We always make them at the dinner table so each one is custom made and everyone has a blast making them. I always thought these were called these spring rolls, but spring rolls are crispy and have a wheat flour skin.
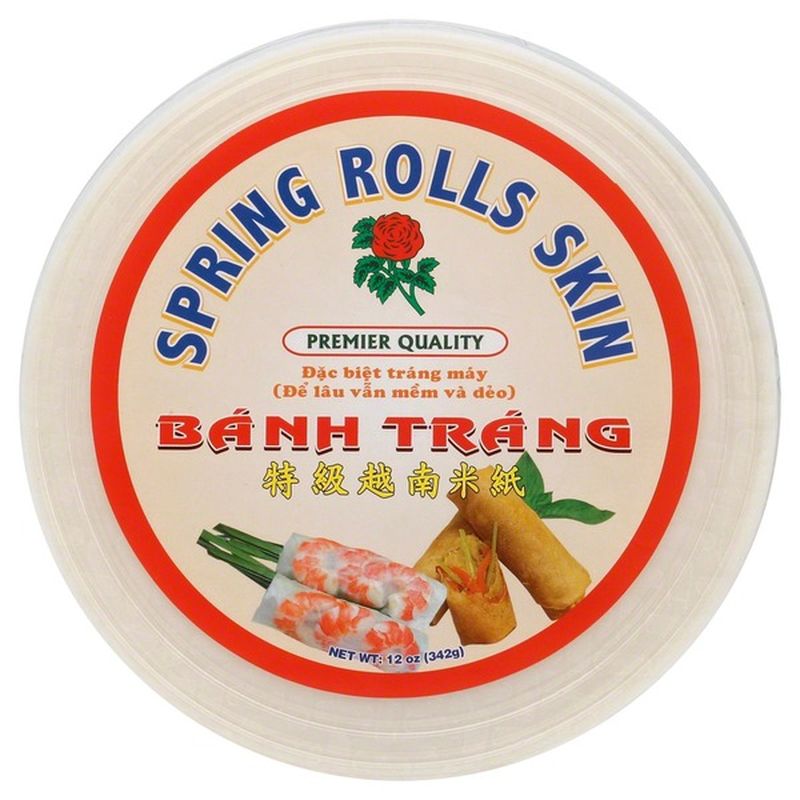
Banh Trang Spring Rolls Skin
Summer rolls are wrapped in  a rice paper skin like the one pictured above.  You simply soak the wrapper briefly and then fill it with whatever you want. There really isn't a recipe.

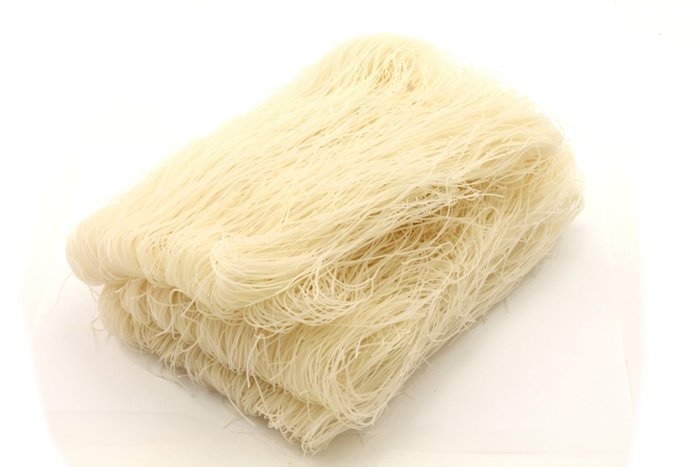
Rice Noodles (Vermicelli) — Rice, Noodles and Rice Paper — Asian ...


For mine I simply cut cucumbers, green onions and carrots into match sticks.  I boiled shrimp, peeled them and then cut them in half. I cooked some rice noodles and grabbed some lettuce leaves out of the fridge. Then I made a sweet chili sauce and we were ready to roll... literally. The only hard part is resisting the urge to overstuff them... if you put too much in them it is difficult to roll them up.

When you roll it simply place your soaked wrapper on a damp towel and roll it up like a burrito: Fold one end down over the filling, roll it up and then fold the other end down... and wah-la... a perfectly rolled summer roll. 

I made this chili sauce to go with it:
1/4 C. rice vinegar
2 T. water
2 T. sweetener - I used honey (the recipe called for maple syrup) but I think next time I'll use sugar
1 T. soy sauce
1 clove garlic
1 inch ginger, minced
1 t. red pepper flakes
juice of one lime

The recipe I modeled this after was vegan most recipes use fish sauce instead of the the soy... it's all up to you.

You can also make a peanut sauce... just google it.

What would you like in your summer roll?


Sunday, May 17, 2020

Naan-tastic


Last night I cooked Indian food. For some reason I have always shied away from making naan and have instead opted to make chapati. I guess making pita bread recently gave me the confidence I needed to try making naan myself. Traditional naan would be baked in a tandoori oven, but since I don't have a tandoori oven I used my cast iron skillet. I was really happy with how it turned out. It was soft and pillowy. Next time I think I will brush on some garlic butter instead of plain butter.

Naan

INGREDIENTS

1 teaspoon sugar
1/2 cup warm water
1/4 oz dry yeast (2 1/4 teaspoons)
2 1/4 cups flour
1/2 cup plain greek yogurt
1/2 teaspoon salt
1 tablespoon oil
3 tablespoons melted butter

In a glass add the sugar, warm water, and yeast together. Stir to combine well. The yeast should be activated when it becomes foamy, about 10 minutes. Place the flour in the bowl of your stand mixer. Make a well in the middle. Add the yeast mixture, yogurt, salt and oil, mix the dough using the dough hook until the surface becomes smooth and shiny. Put dough in a bowl and cover the dough with a damp cloth. Let it rise. The dough should double in size, about 1 hour. I let mine rise while I made the rest of the meal.Next you are going to divide the dough into 8 equal portions and roll into rounds.

Heat up a cast-iron skillet over high heat and lightly grease the surface with some oil to avoid the dough from sticking to the skillet. Place the dough on the skillet. When it puffs up and bubbles and burnt spots appear, flip it over and cook the other side.
Brush the naan with the melted butter, serve warm. 


Saturday, May 16, 2020

Salad Days

 Over the past week I have been trying to eat healthy foods, do more exercise and live the clean life.  I have been eating salads and drinking smoothies. I have reduced red meats and I cut out the beer and red wine entirely.... and NOTHING.... not a pound shed. Usually the first few pounds drop pretty quickly and that motivates me to keep going. This week, however, I actually gained a few pounds... so I just stopped stepping on the scale. I'm feeling frustrated because me and my husband actually had a bet riding on it... and I'm losing (the bet...not any inches or pounds).  So last night we ordered pizza and had some wine with it. Salad days no more! That said, I'm not giving up... I'm still going to keep plugging on. Even if the only thing lighter right now is my pocketbook. Tonight I'm making Indian food and homemade naan... but starting tomorrow it's back to salad days once again.

I'm on the hunt for interesting low fat foods and ways to make exercise fun. I love to cook and the only way I will get through this is by resetting my thinking and finding fun food and cooking projects that aren't bad for me.

I have my work cut out for me. My biggest weakness is fresh baked bread. I can't give that up entirely, but I will try my hardest to make my baking healthier and less frequent. If I fail at that I may be delivering baked goods to my friends to save myself!


What is your favorite trick to eating healthier and getting more active?  Leave a comment and share!


Tuesday, May 12, 2020

Pokebowl GO!

Today for lunch I made Poke bowls.  Normally we have salmon and cream cheese on bagels as one of our afternoon meals but this week my husband and I are embarking on a healthy eating challenge and I thought I'd look for an alternative to the  bread-y bagels  and rich cream cheese. This was filling and wonderful and it could be made with a variety different ingredients. Several of the recipes that I found even used "anything bagel" topping in place of the furikake. The possibilities for these bowls are limited only by your imagination. It would be a great way to use leftover slaw or salad and rice.

If you'd like to know more about the origin of Poke I found this article on Chowhound.

Furikake (this makes enough for 4-6 servings)

2 nori sheets cut into small pieces
2 T. toasted sesame seeds
2 t. sugar
1/2 t. sesame oil
pinch of salt

Dressing (I doubled this recipe and I had plenty leftover for another round of salads)

2 T. soy sauce
2 cloves garlic
Juice from one half a lime
1 T. each rice wine vinegar, sugar and sesame oil

The Bowl:

  • You'll need to make some rice (brown, long grain, or jasmine all will work)
  • 2 oz smoked salad per serving
  • 1/2 - 1 scallion per serving
  • 1/4 of an avocado per serving
  • 2-4T chickpeas (I didn't have soy beans and I was surprised at how well this worked)
  • Thinly sliced veggies (I used cucumbers and sweet peppers)
  • pickled gin

I marinated the salmon in some of the dressing for about a half hour, but frankly I don't think that was totally needed. Smoked salmon is already pretty salty and I think it could have done with a lighter marinade of just a little sesame, citrus, garlic, vinegar and sugar.

After the rice was made I cooled it and topped it artfully with all the wonderful things I chopped up. 

Some things I might add that I didn't today: something crunchy like nuts or chopped cabbage, other veggies like radishes and carrots, other meats like left over chicken, marinated tofu... the possibilities are endless!

What do you like on your Poke Bowl?


Monday, May 11, 2020

Time for Thai

I love making Thai food. One of my favorite things about it is that once you get the prep work out of the way it is amazingly fast and easy to make. My two favorite Thai dishes to make are Green Curry and Pad Thai. I especially love the green curry because it is so versatile.
If you have the seasonings and the coconut milk you can add just about anything you have to the sauce. The only hitch is that the ingredients don't cook long in the sauce so ingredients that take a long time to cook need to be cooked before you add them to the sauce. The only ingredient that I wasn't fond of cooked in green curry sauce were potatoes. Potatoes really work best when they have plenty of time to soak up the flavors of the sauce and par boiling them and adding them to the curry sauce really didn't work. It was ok it was just bland for a curry.

So the key to this like I said is time management. I really think that you need to have all the ingredients prepped and ready to go before you heat up the wok.

2T. oil or ghee
1.5-2 lb chicken
1 T. grated ginger
1-3 jalapeños
3 cloves of garlic
1 shallot or small onion
1/2 tsp. cumin
1/4 tsp. coriander
1/4 tsp. tumeric
1 can coco milk
2 Tbsp. lime juice
1 medium bell pepper
1 C. sugar snap peas
1/4 fresh basil and cilantro

To prep:  I like to start by putting on my rice. If I put it on while I prep then I won't forget. Then I cut up chicken. Next I chop onions, jalapeños, ginger, and garlic and place them in a bowl with the spices. Make sure to open your can of coconut milk and squeeze the lime juice. Then cut up your bell peppers and put them in a bowl with your snow peas. Now that all the chopping is done you are set up to cook just like they do on the cooking show.

The cooking:

  1. Cook the chicken in butter until it is cooked through and then set aside.
  2. Add the bowl that you set aside with the spices, jalapeños, ginger, onion, and garlic. Cook for 2 minutes. 
  3. Add salt, coco milk, lime and your bowl with the snap peas and peppers. Cook until it is a vibrant yellow and green color.
  4. Take it off the heat, stir in chicken and allow to cool slightly before you add in the fresh herbs.


Tell me your favorite prepping short cut.


Friday, May 8, 2020

The Upper Crust

 Making bread has become a regular part of my cooking routine.  Even before the stay at home orders I was baking bread pretty much weekly. So when everything went a little nutty at the store and yeast started flying off the shelves I was glad I was fairly stocked up. I only had one time when I was in need and Gumby's Pizza came to the rescue and sent a small ranch container of yeast with our Pizza order. Last night I made my typical artisanal bread. It makes two small loaves, which is enough for dinner and then a loaf for breakfast the next day. This is a pretty easy recipe and one I use a lot.

Ingredients
2 C warm water
1 T sugar
1 T yeast (or one packet)
1 T. salt
4-5 cups flour


First add the sugar water and yeast together and let it sit for 5 to 10 minutes until it gets frothy.  I do this in the bowl for my stand mixer so that I can just add the flour and start mixing when I'm ready.

Next using the bread hook add the flour and the salt. I add about 3 cups of flour and then add the flour a cup at a time until it starts to pull away from the side of the bowl
.

    Have it rise until doubles
Once the mixture is just mixed together I like to hand knead my dough for a while. If you don't want to do that then you will just let the mixer work on it until the dough has an elastic texture.


Next I transfer my dough to a glass bowl that I've coated with olive oil. I let the dough rise until it doubles in size. It can take as little as 30 minutes but it usually takes closer to an hour.
Divide the dough in half

Punch down the dough and divide it into two equal parts. You will form each half into a loaf. You can make long loaves like I did last night... or round ones. Or you can make one of each. Cut three slashes in the top of each loaf and leave them for the second rise (about 30-45 minutes).
While you wait for them to rise cover with a towel. Preheat the oven to 400 degrees. I like to bake mine on a pizza stone that I keep in the oven while it preheats. Bake for 30-40 minutes and then cool on a wire rack.  Serve with olive oil or butter.
Here are what the loaves look like after the second rise
Now it's time to eat.


Thursday, May 7, 2020

Pick a Peck of Pita Pockets

I made pita bread for the first time the other day. We used it to serve lamb burgers with taziki sauce. It tasted so much better than the store bought stuff. I looked at a lot of recipes and finally settled on one. It puffed up nicely and it made the perfect pocket to put our burger in. We served it with a side salad (with olives and feta cheese). I will share the recipe and a few pictures. It is no wonder that pita bread has been around for so long (since approximately 2500 BC)...because not only is it food... it's a utensil.  


Ingredients
8 almost perfectly puffed pitas


1 package active dry yeast (I used Platinum from Red Star... I wish I had taken a picture of the first rise... it was spectacular and didn't take nearly as long as expected)
1 teaspoon turbinado sugar
11/2 cups warm water
1 teaspoon salt
31/2 cups flour, plus more for dusting
olive oil

Directions

  1. In the bowl of a heavy-duty electric mixer fitted with a dough hook, combine the yeast, sugar, and warm water; stir to blend. Let the yeast stand until foamy, about 5 to 10 minutes.
  2. Stir in the salt. Add the flour, a little at a time, mixing at the lowest speed until all the flour has been incorporated and the dough gathers into a ball; this should take about 4 minutes.
  3. Turn the dough onto a lightly floured surface and knead until it's smooth and elastic. Transfer the dough to a lightly oiled bowl, turn it over to coat, and cover with plastic wrap. Allow to rise until double in size, about 1 1/2 hours.
  4. Place a large pizza stone on the lower oven rack, preheat the oven (and stone) to 500 degrees F.
  5. Punch the dough down, divide it into 8 pieces, and gather each piece into a ball; keeping all of them lightly floured and covered while you work. Allow the balls of dough to rest, covered, for 15 minutes so they will be easier to roll out.
  6. Using a rolling pin, roll each dough ball into a circle that is about 8-inches in diameter and 1/4-inch thick. Make sure the circle is totally smooth, with no creases or seams in the dough, which can prevent the pitas from puffing up properly. Cover the disks as you roll them out, but do not stack them up. Put 2 pita rounds at a time on the hot pizza stone and bake for 3 to 4 minutes, or until the bread puffs up like a balloon and is pale golden. Watch closely; they bake fast. Remove the bread from the oven and place on a rack to cool for 5 minutes; they will naturally deflate, leaving a pocket in the center. Wrap the pitas in a large kitchen towel to keep them soft.
    Look at that beautiful pocket!

Tuesday, May 5, 2020

The Hunger Games

I love cooking competitions. It all started a few years after I was married when I borrowed a friends collection of Iron Chef on VHS. I loved that show! My husband and I would  watch that poorly dubbed gem and eat junk food until late in the night. 

Whose cuisine will reign supreme? Iron Chef | Alex England TV ...

I'm not a huge fan of the newer versions of Iron Chef. I have watched a few episodes and even though they are fine they just don't remind me much of the original show. Iron Chef for me was all about being campy and showcasing interesting ingredients. Iron Chef America always seemed like it was just a Food Network vanity showcase.Some of the other shows I've enjoyed along the way are:  Cut Throat Kitchen, Top Chef, Chopped, and even though I don't like cake very much I love watching shows where they decorate cakes and cupcakes. The only shows that are off the table for me are all those mean spirited ones with Gordon Ramsey yelling at everyone.One of my all time favorite cooking competitions is The Great British Baking Show. So when I heard that the 2015 champion Nadiya Hussain had her own cooking show on Netflix I decided to check it out. I have to say that it didn't totally WOW me, but it has a lot of good ideas and I think that I will watch it again. Her approach is to help people save time in the kitchen by using shortcuts. Some of her ideas are really clever and with a little tweaking I think that I will be able to use some of her ideas and recipes at home. I've only watched a few episodes so the jury is still out. Some of her shortcuts are a little on the short side for me.... for example I would never use spaghetti Os in ANYTHING. Most of her recipes, however, sound pretty good. Here is the recipe I tried at home:

I didn't have any mushrooms on hand so I started out by sautéing bell peppers, onions and garlic for my omelet.


I add the eggs to the mixture.  Unlike her I didn't have any sun-dried tomato spread so I used pesto sauce on my tortilla. 

I topped the omelet with the tortilla. Flipped it. Then cooked until the tortilla was crispy and the eggs were fully set. I rolled it up and served it with a salad and marinated tofu.

What is your favorite cooking show?  

Monday, May 4, 2020

Go To Your Frappe Place!

Sadly, I can't go to my Frappe place right now.  With coffee shops closed (other than drive thru services) I have to find other ways to support my local shops. I do that by buying beans to make coffee at home. Most days I just like to brew a cup in my stove top espresso maker... or better yet have someone else brew it and bring it to me in bed. Lately, however, my daughter has been making frappes at home. It is a wonderful way to enjoy a cup of coffee even on a hot day. She likes to use caramel sauce, but you can use other flavors if you like.  Many recipes call for instant coffee, but I prefer it this way.
Here is her recipe:

1 C coffee
1 C milk
2 C ice
vanilla extract, to taste
caramel sauce, to taste
sugar, to taste
whipped cream

Blend it all together, pour it in a pint glass and top with whipped cream and a little caramel sauce.  Enjoy!

Easy Caramel Sauce:


I C. packed brown sugar
1/2 C. butter
1/4 C. milk
1 t. vanilla

Bring brown sugar, butter, and milk to a gentle boil and cook until thickened, 1 to 2 minutes. Remove from heat; add vanilla extract.


Tamales and Karaoke